Info
CMA (Cisco Meeting App) is a desktop conferencing application used to connect one or more people to IVC video conferences at Utah State University using a computer or mobile device. This page will guide you through the process of connecting to an event.
Requirements and Preparation
You'll receive a link that will allow you to connect to the event. In order to connect, you'll need the following:
- A reliable internet connection
- A computer with a microphone and camera (note that iOS devices are not supported and mobile devices of any kind are discouraged)
- Google Chrome with Hardware Acceleration turned off.
As noted above, Hardware Acceleration needs to be disabled in Google Chrome for best results. By default, Hardware Acceleration is turned on in Chrome. To disable it, follow these easy steps:
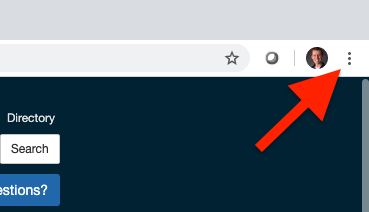
- Open Google Chrome
- In the upper right hand corner of the window, click on the three vertical dots. A drop down menu will appear.
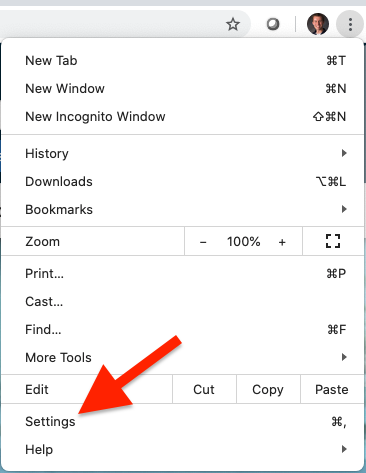
- In the drop down menu, select "Settings."
- Using the search bar on the Settings page, search for "Hardware Acceleration."
- Disable "Use hardware acceleration when available" by clicking the toggle.
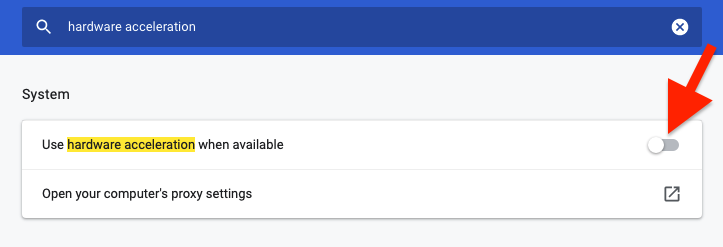
- Relaunch Google Chrome for the changes to take effect.
As with any desktop conferencing application, the quality of the connection is largely dependent on the hardware and network it's running on. While most modern computers are supported, a full list of requirements can be found here.
Perform a Self-Test
It is strongly recommended you perform the following self-test before connecting for the first time or when using a new network. This test will check your microphone and camera settings on your computer, along with your network connection. It should be performed at the same location using the same hardware that will be used for the actual event.
To perform the self-test, open Google Chrome and go to test.webrtc.org. When prompted by Google Chrome, allow test.webrtc.org to use your microphone and camera then click the green start button along the top of the page. For an optimal experience, you'll want a green checkmark next to each item. If you see a warning next to Ipv6 and/or Reflexive connectivity, you do not need to be concerned. If you receive an "x" next to anything else, start a chat with us or email ivcschedule@usu.edu as soon as possible but at least one business day before the event.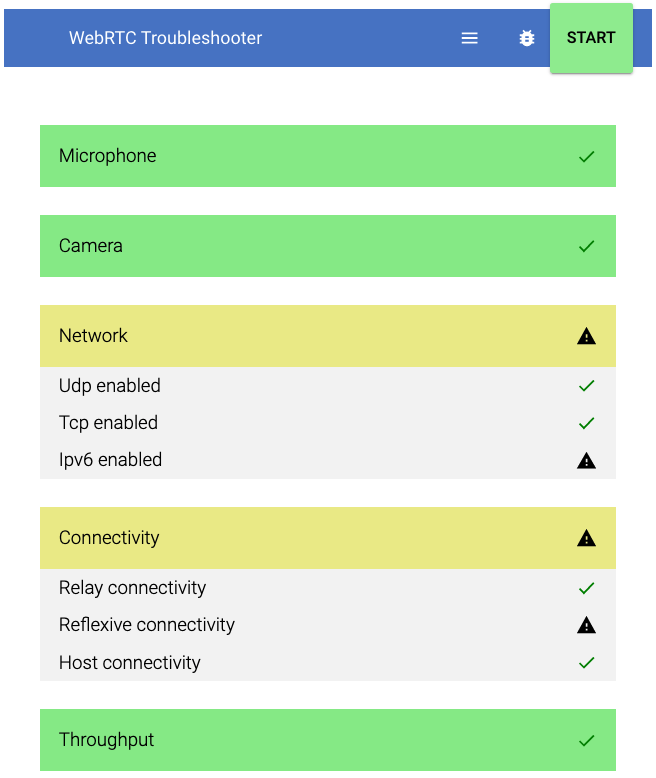
Connect to the Event
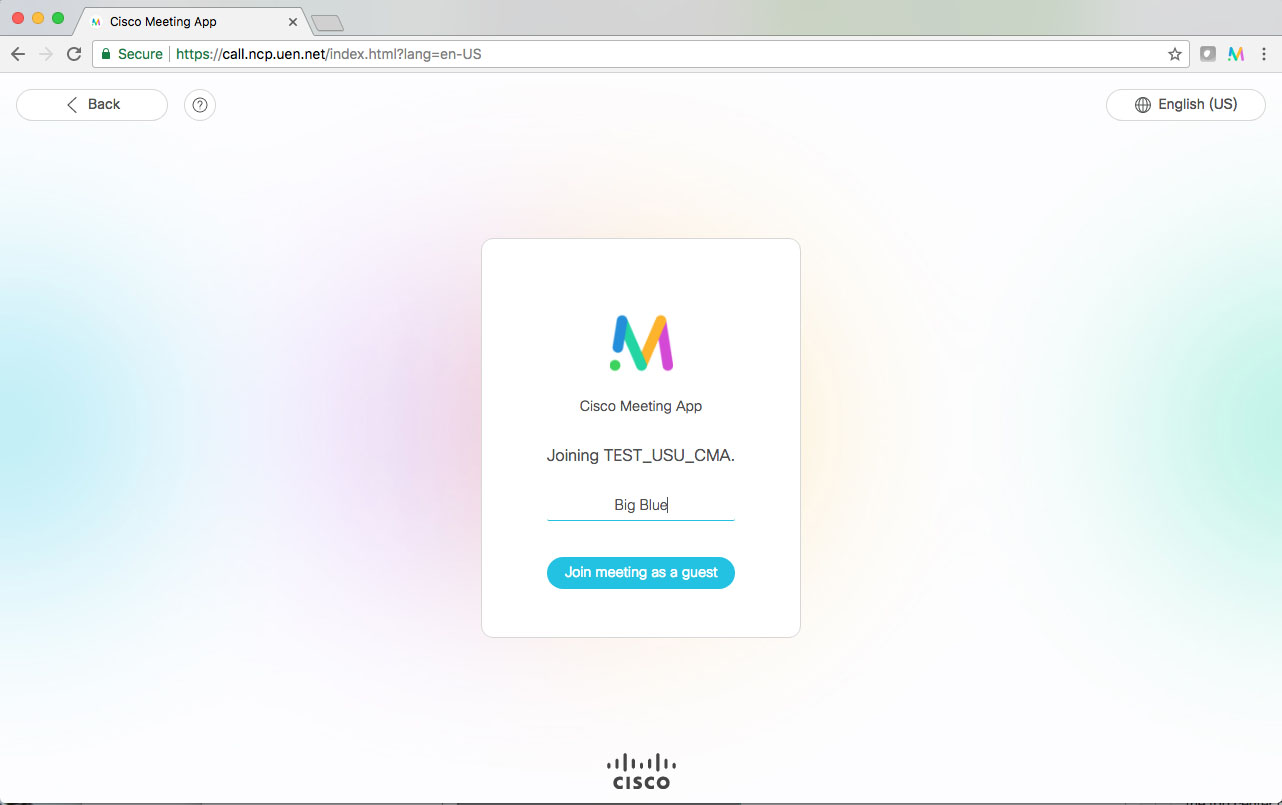
- The link for your event will allow you to connect up to 9 minutes before the start of the event. To connect, open the link in Google Chrome.
- When you open the link, type in your name and click "Join meeting as a guest."
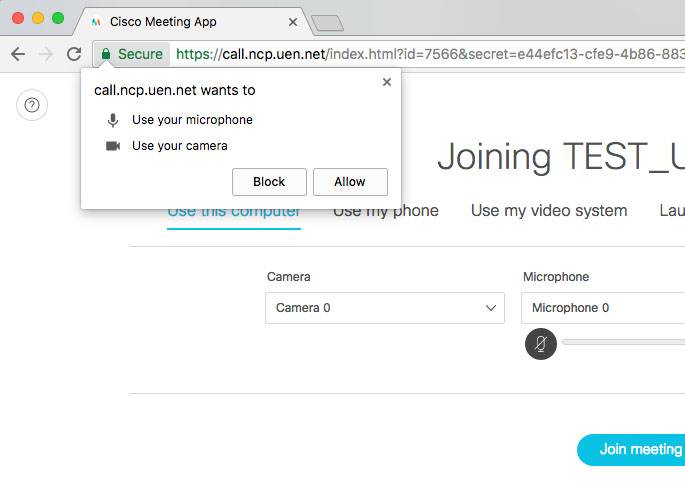
- If this is your first time connecting, a pop up will appear asking you to allow the website to use your webcam and microphone. Select "Allow." If the webcam and microphone are blocked, you will not be able to connect. If you accidentally clicked "Block," check the Troubleshooting section below.
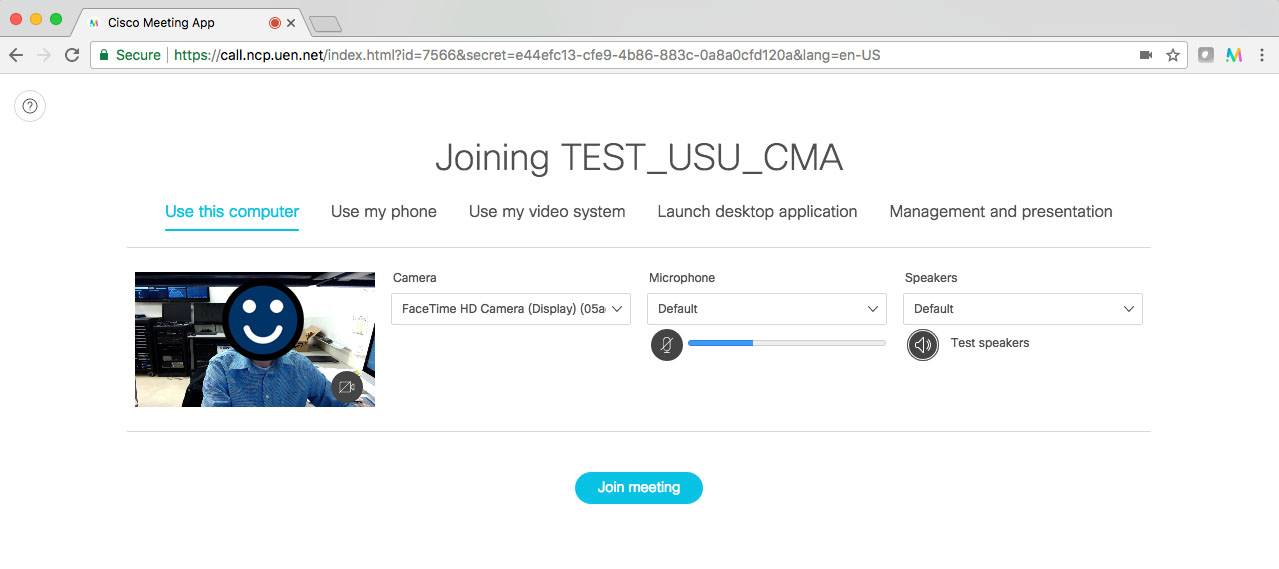
- Once you've allowed your webcam and microphone, you'll see a settings page where you can ensure your webcam, microphone and speakers are working correctly before connecting to the event. Once you're happy with your settings, click "Join meeting."
Sharing Your Screen Through CMA:
To share your computer screen during an event, simply press the share screen option along the bottom of CMA and select what you want to share.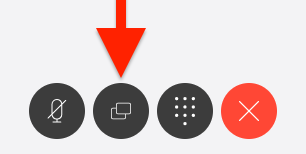
When sharing your screen for the first time, you may be prompted to allow the system to share your screen. Ensure this is allowed in order to share your screen.
Video Conferencing Etiquette
When connected to an event, help ensure a positive experience and minimize disruptions for everyone by following the guidelines below:
- Enable your webcam so others can see you and get to know you.
- Mute the microphone when not speaking to reduce background noise.
- Limit the amount of distractions in the room like animals, other people, tv, etc.
- Connect from a private room (home office or bedroom) if possible.
- Keep the area in view of the camera clean and professional by removing clutter, distracting posters, etc.
- Use an appropriate office/desk chair, facing the camera, with sufficient lighting (avoid lying in bed, on a couch, or sitting in the dark).
- Dress as if you are attending the event in person (no pajamas).
- Food and drink should be kept to a minimum.
- If possible, use a headset instead of built-in speakers and microphones. This will improve your audio and help prevent echoes at the other locations.
Troubleshooting
- If after clicking "Join meeting as a guest" you get an error, try clicking it a second time.
- If on the settings page you click "Join Meeting" and are unable to join, you may have accidentally blocked your webcam and microphone. If the site doesn't recognize your webcam or microphone, you won't be able to connect. Try the following:
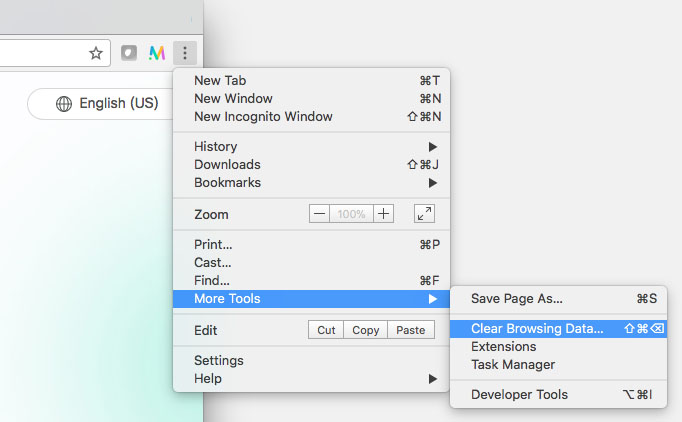
- In Google Chrome, open the "Clear Browsing Data" menu by clicking on the three dots at the top right, selecting "More Tools and "Clear Browsing Data."
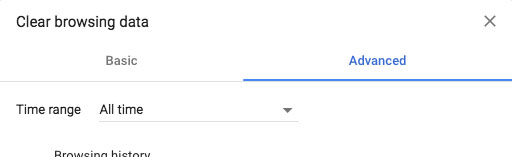
- Select the "Advanced" tab and change the "Time range" to "All time."
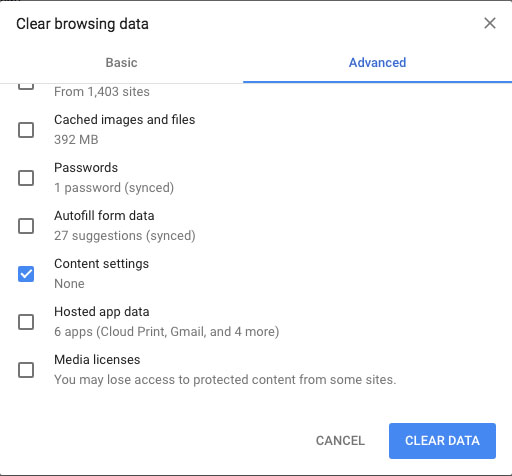
- Check the box next to "Content settings" then click "Clear Data."
- Open the link for your course in Google Chrome.
- Type in your name and select "Join meeting as a guest."
- A pop up may appear asking you to "Show notifications." Click Allow.
- Another pop up will appear asking to use your microphone and camera. Click Allow.
- You should now be able to verify your camera, microphone, and speakers are working correctly, then click "Join Meeting."
- In Google Chrome, open the "Clear Browsing Data" menu by clicking on the three dots at the top right, selecting "More Tools and "Clear Browsing Data."
- Ensure Hardware Acceleration is disabled in Google Chrome. Instructions for disabling this can be found in the "Requirements and Preperation" section on this page.
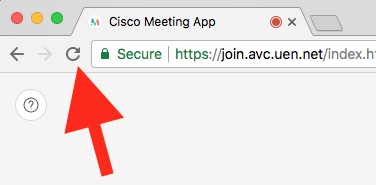
- Refresh the page by pressing the page refresh button in Google Chrome. If video still doesn't show, try refreshing the page again.
- Ensure Hardware Acceleration is disabled in Google Chrome. Instructions for disabling this can be found in the "Requirements and Preparation" section on this page.
- You may be using or have used another application that has locked the camera and is not letting other applications, like CMA, use it. Other video conferencing applications like Skype may do this. Ensure other applications that may be using the camera are closed. If all applications are closed and the camera is still not working, try restarting your computer.
- You may have accidentally blocked your webcam from CMA. Try the following:
- In Google Chrome, open the "Clear Browsing Data" menu by clicking on the three dots at the top right, selecting "More Tools and "Clear Browsing Data."
- Select the "Advanced" tab and change the "Time range" to "All time."
- Check the box next to "Content settings" then click "Clear Data."
- Open the CMA link for your event in Google Chrome.
- Type in your name and select "Join meeting as a guest."
- A pop up may appear asking you to "Show notifications." Click Allow.
- Another pop up will appear asking to use your microphone and camera. Click Allow.
- You should be able to see a preview of your camera. Verify your camera, microphone, and speakers are working correctly, then click "Join Meeting."
- In Google Chrome, open the "Clear Browsing Data" menu by clicking on the three dots at the top right, selecting "More Tools and "Clear Browsing Data."
- Some older webcams may not work with the system. Try using a different webcam if possible.
This is most likely caused by low bandwidth on your network or, depending on the age of your computer and your processor, your computer may be having a hard time keeping up. The following suggestions may help:
- Other internet connected devices/services can significantly decrease your network speed (e.g. Gamining Consoles, iPads, Netflix, etc.). Ensure these devices/services are not in use during the conference.
- Check your internet speed at http://speedtest.uen.net/. If you don't have at least 2 Mbps upload and 2 Mbps download, we recommend going somewhere with a faster internet connection. 2 Mbps up and down is recommended.
- Close out of any other applications you may have open on your computer. This will free up more resources for your video conference connection.
A hard-wired connection will be more stable and reliable than a wireless network, even if the wireless network is faster then the hard-wired network. Wireless network speeds often change based on how many people are on the same wireless network.
As long as the hard-wired connection meets the network requirements listed on this page, we recommend using the hard-wired connection for the best quality and experience.