Overview
Huntsman Hall is the building that houses the Jon M. Huntsman School of Business in tandem with the Eccles Business Building. In the Huntsman Hall, we have certain systems in our Connect classrooms that are different than the Touch 10 Systems. These systems are very unique and customizable, where they can better fit the needs of the professors teaching in these rooms. While working as a facilitator, there may be a time where you sign up for or substitute a class in one of the rooms in Huntsman Hall.
Video
Here is a short clip explaining the functionalities of the Huntsman Hall Touch Panel:
Introduction
You will find that the white Touch Panel is located on the instructor’s desk. There will not be another Touch Panel at the facilitator’s desk. You will instead use a desktop version of the Touch Panel from your facilitator computer in the back of the room.

While using the Huntsman Hall Touch Panel, you need to remember that we are using the Video Conferencing system. Make sure that you are using the Video Conference settings by making sure that the Video Conference tab is selected in the upper right-hand corner of the screen on the Touch Panel.

After you have clicked this tab, the window will appear where you will be able to access all of the room’s controls and settings to help facilitate your course. Remember, the specific button layout of every room is unique, so please make sure you take time to go and familiarize yourself with your room and understand how it works.

Main Screen
You will see a large difference between this system and the Touch 10 system. However, this system is very straight forward and is easy to learn. The main screen is the place where you can
- Start sharing content/sharing your screen with distant sites
- Control the cameras and microphone mutes
- Power on displays and control the volume settings
Source Sharing
The controls for Sharing Content are found on the main screen. Below is a picture showing the large gray box with the camera view showing inside with the 3 present sources to share above. If you are currently not sharing anything, your widow will look something like this:
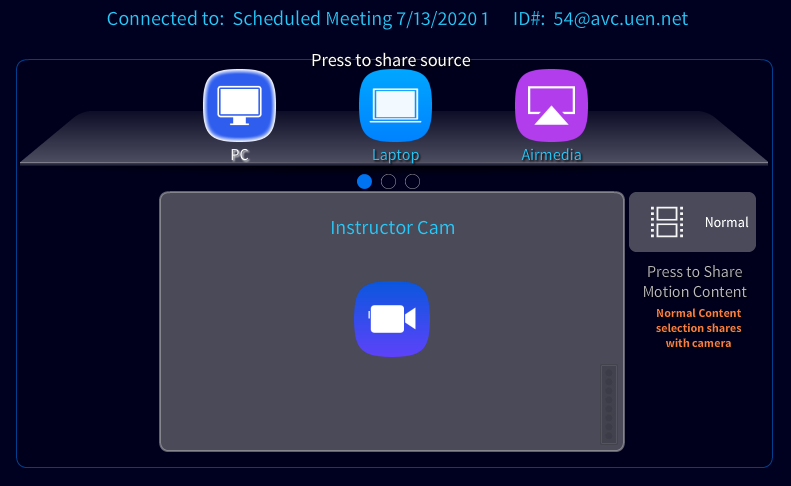
This is currently showing that there is no present source being shared with the distance sites. This is also showing that the instructor camera is being shown and used. To share screen with the Huntsman Hall Touch Panel is very simple. Above the gray box, you’ll see 3 present sources you can choose from. To share a screen, simply click on the present source you would like to share and you will begin sharing that source in the call. The gray window will now show the camera you are using along with the source you are presenting.
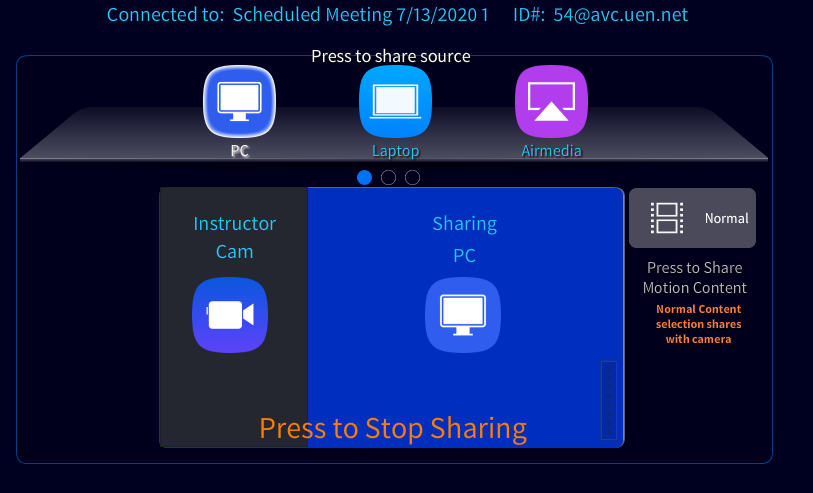
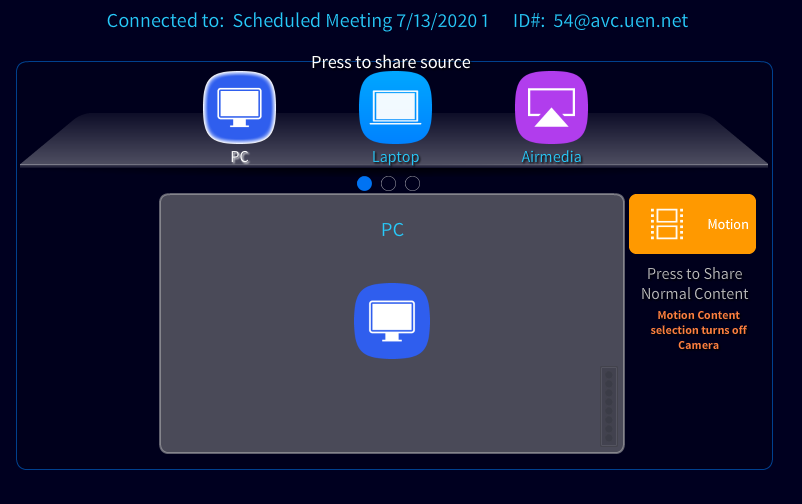
To stop sharing, simply click the orange “Press to Stop Sharing” phrase that is now showing in the window. If you notice the gray box with “normal” written in it next to the gray window, this shows the quality of content being shown. If you are planning on showing things like PowerPoint presentations, websites, and word documents, keep this box showing “normal”. This enhances the quality of still images and makes them crisper and clearer to the distance sites. However, if the class is watching a YouTube video, a movie, or a moving presentation of any kind, you can click on the “normal” button, making it change to an orange “motion” button.

This option allows you to share content with the other sites, but it turns off the camera. This reduces the amount of content being sent out and produces smoother and clearer video presentations. To use this button, change to the motion option, then share a source. This will change slightly compared to when the box reads “normal”. This will now only present the PC and will no longer show the camera source in the call. Coordinate with your professor to make sure that you use the motion option when they are showing any form of video or motion during their class.
Camera Controls
Next, we are going to discuss camera controls. They are located on the main page of the Huntsman Hall Touch panel on the right-hand side of the screen. The camera controls let you switch between student and instructor cameras, adjust the angle and zoom of each camera, and control the all mute and student mic mute buttons. The All Mics On and Student Mics On buttons work exactly the same as the All Mute button and Student Microphone mute buttons on other Touch Panels. The All Mics button controls all outgoing audio from your classroom, and the Student Mics button controls the outgoing audio from the student microphones around the room.

These camera controls also have programmable preset locations. By clicking on the 1,2, or 3 under presets, the camera will automatically adjust itself to go to the predetermined location. To reprogram a preset, move the camera to your desired angle and zoom. Once you have moved the camera, click and hold the preset number you want to assigned it to. After clicking and holding the numbered button for 7-10 seconds, the button should now be programmed to move the camera to that exact location when pressed.
Volume and Display Settings
In the bottom left hand corner, you will see a bunch of either green or gray power buttons and in some rooms, a microphone icon. These buttons are the power buttons that turn the projectors and monitors on in the classroom. Labelled as such, if you click a gray button, it will turn green and turn the respective device on. If you click a green button, it will turn gray and turn the specified device off. The microphone icon signifies Room Amplification. Some of the rooms in Huntsman Hall have room amplification features, meaning that when someone talks through the instructor microphone, it will amplify their voice a bit throughout the room so people in the classroom can better hear the professor. You can turn this on and off by clicking the microphone icon here. Blue means it is on and gray means it is off.

In the bottom right hand corner, you will see the volume control. The up arrow turns the volume up and the down arrow turns the volume down. There is also a mute button that will silence the sound in the room. This is not the all mute button. This merely silences the room that you are in.

Different Tabs and Pages
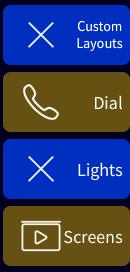
Now that all the functions of the main page have been discussed, it is time to learn about the different tabs and pages you can find. These tabs are found on the very right-hand side of the Huntsman Hall Touch Panel.
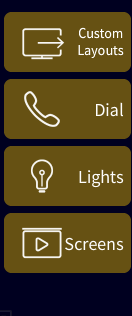
There are 4 different tabs that you can switch to from the main screen. These tabs include the Screens, the Lights, Dial, and the Custom Layouts. The Dial tab is rarely ever used by facilitators, but is used to manually dial into different calls and meetings directly from the Touch Panel.
When you click on a tab, it will bring you to a completely new window. You will know which tab you are currently on by looking at these 4 buttons on the right. If one of them is blue, that means that tab is currently open. After clicking on the screens tab, a new window will appear that looks like this:

As you can see, all of the options from the main page of the Huntsman Hall Touch Panel have been changed to just these 2 switches. In HH 326, there are two projectors. These buttons will raise and lower the projector screens respectively. To exit this tab, simply click on the blue “X” that appeared over the screens tab on the right-hand side of the screen. This will return you to the main page.
If you click on the Lights tab, a new screen will appear that looks like this:
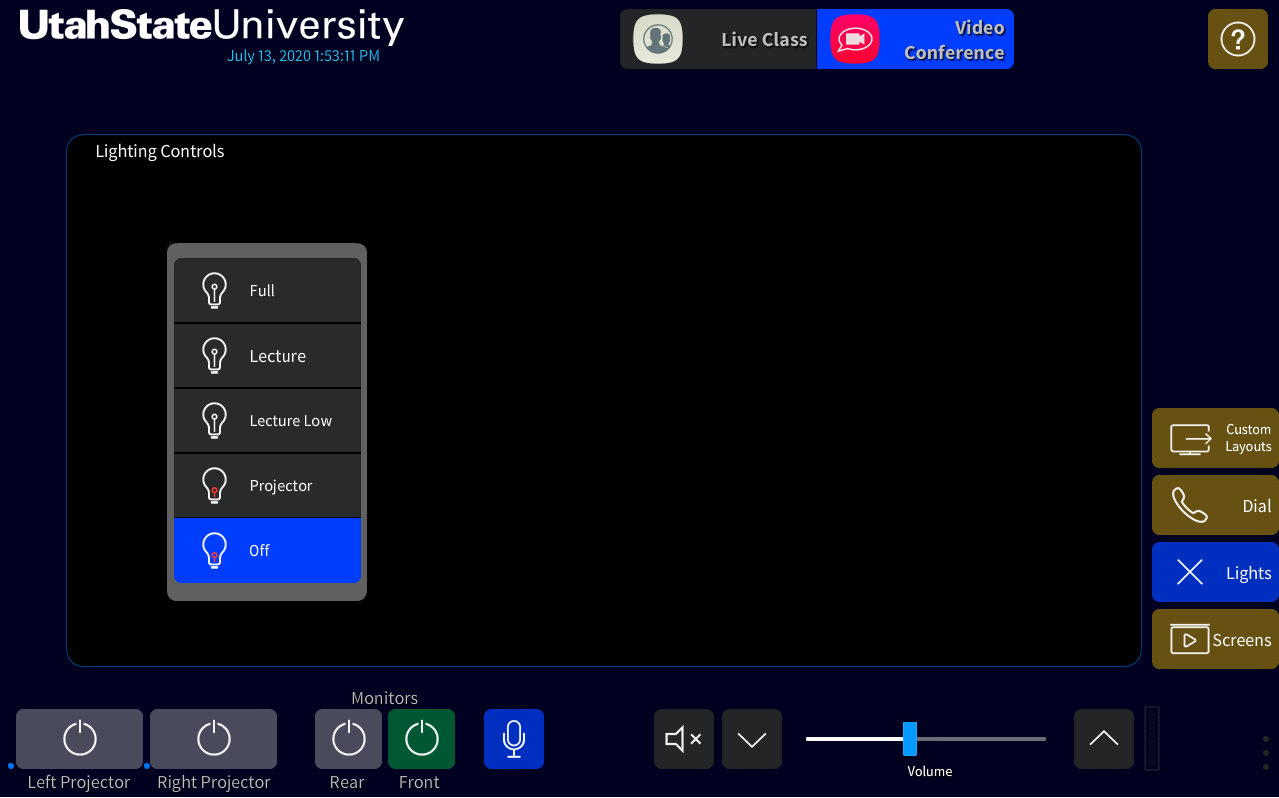
Similar to the Screens tab, this new window replaces the main screen options with new options about lights. This room features 5 preprogrammed options for your room’s lighting. You can test each of these programmed options by clicking on the different available options listed, like Full and Projector. To exit, simply press the blue “X” that is currently over the Lights tab on the right-hand side of the screen, just like the Screens tab before.
Custom Layouts
Finally, the most important tab that you will use as a facilitator is the Custom Layouts tab. This tab, when clicked, will bring up a screen that looks like this:
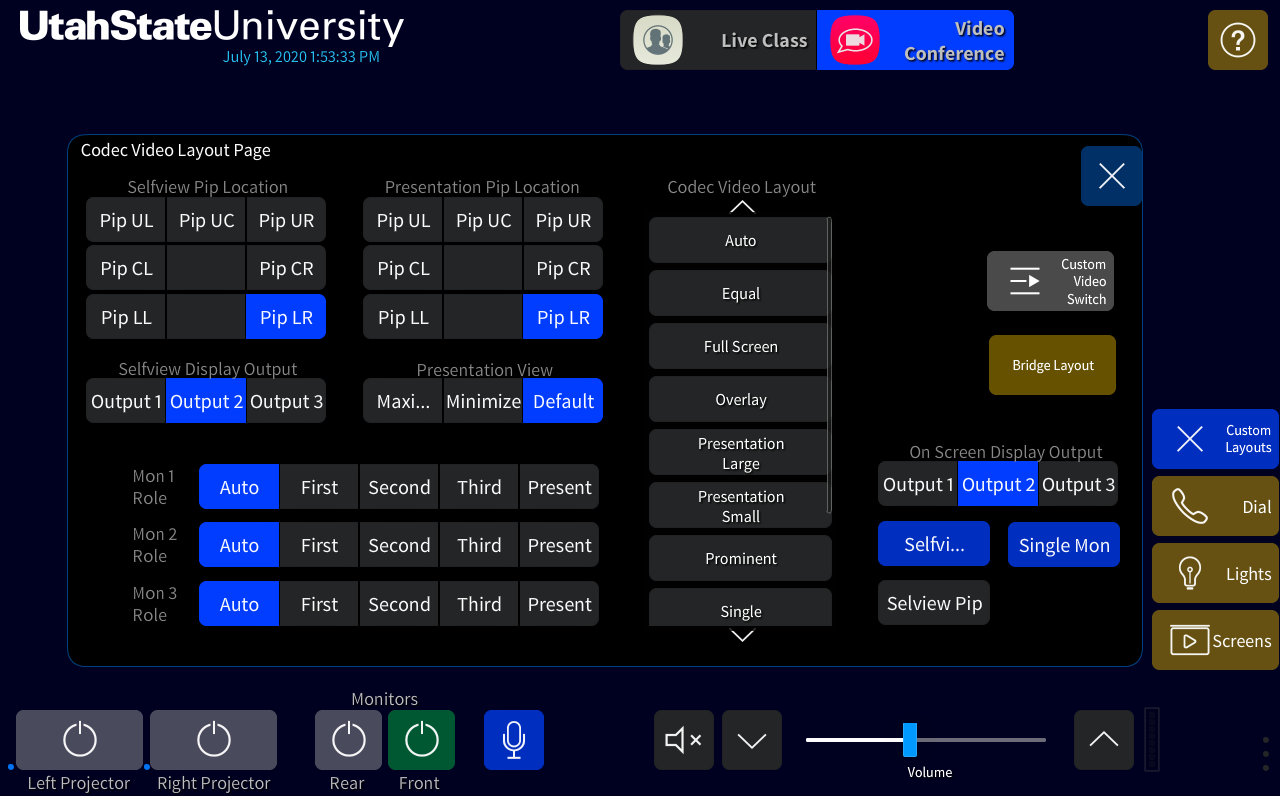
There may seem like there is a lot of different buttons and options that are available to use. While this is true, you don’t need to be worried about remembering every little detail of this page. The Classroom Info Pages on this Troubleshooting Hub have all of the information for each Huntsman Hall classroom and what buttons need to be selected on this screen to run your class. Please refer to them while setting up your classes.
You will notice things like the Codec Video Layout, the Monitor Roles, the Selfview Pip location, and more on this page. As you read the information on the room's Classroom Info page, you will find a picture of the Touch Panel with the correct settings to set up your room. By matching that picture in the Classroom Info page, you will have everything ready for your class.
On this page, however, the right-hand side shows a couple of controls that you need to be aware of. They include the Custom Video Switch, The Bridge Layout button, and the on-screen display options.

- The On-Screen Display Output. They have control over where you have the on-screen display, which shows the number of participants and other in call information. You can select which output (or screen) it will show on.
- The Selfview Button. This button lets you show your selfview or not.
- The Single/Triple Monitor Button. This button is important because it allows you to decide if you want all of your sources to be split between three monitors (triple monitor mode) or to be combined into a single monitor view (single monitor mode).
- The Bridge Button. The Layout cycles through the different site layouts you can have on screen when you press this button. After clicking the button, a very recognizable beeping noise will sound and the layout of the sites will change. Unlike the Touch 10 system, you cannot choose which layout you want initially. To change to the desired layout, you must cycle through all of the options to get to the one you would like to use. Remember to ask your professor which layout they would like to have for their class.
Custom Video Switch
5. The Custom Video Switch. This is where you can manually pick and choose which monitor shows which source. It is a very interesting and useful tool for the Huntsman Hall rooms and provides a sense of creativity and uniqueness to each classroom. When you click on this tab, it will open up a new window. This will have all of the different places you can show/use a source. For example, the number 1 blue box in the upper left-hand corner is labeled “Projector 2”. This means that currently, Projector 2 is showing the PC. To control this page is strange and finicky at times, but is very simple. To change the source of a location, simply click and drag the list of sources located above the blue boxes left and right until you find the desired source you would like to use. Once you have found the source, click, hold, and drag the source to the desired box. Once you have hovered over the desired location, simply let go of the source and it will change the desired box to that source. This works 85% of the time. If this does not work for you, try clicking and dragging the source that is in your desired location out of the box, making it empty, then try moving your new source again. It takes some practice and some patience to get it right, but it will work eventually. If you are still having troubles with it, please open up a chat with us and we will help you out.
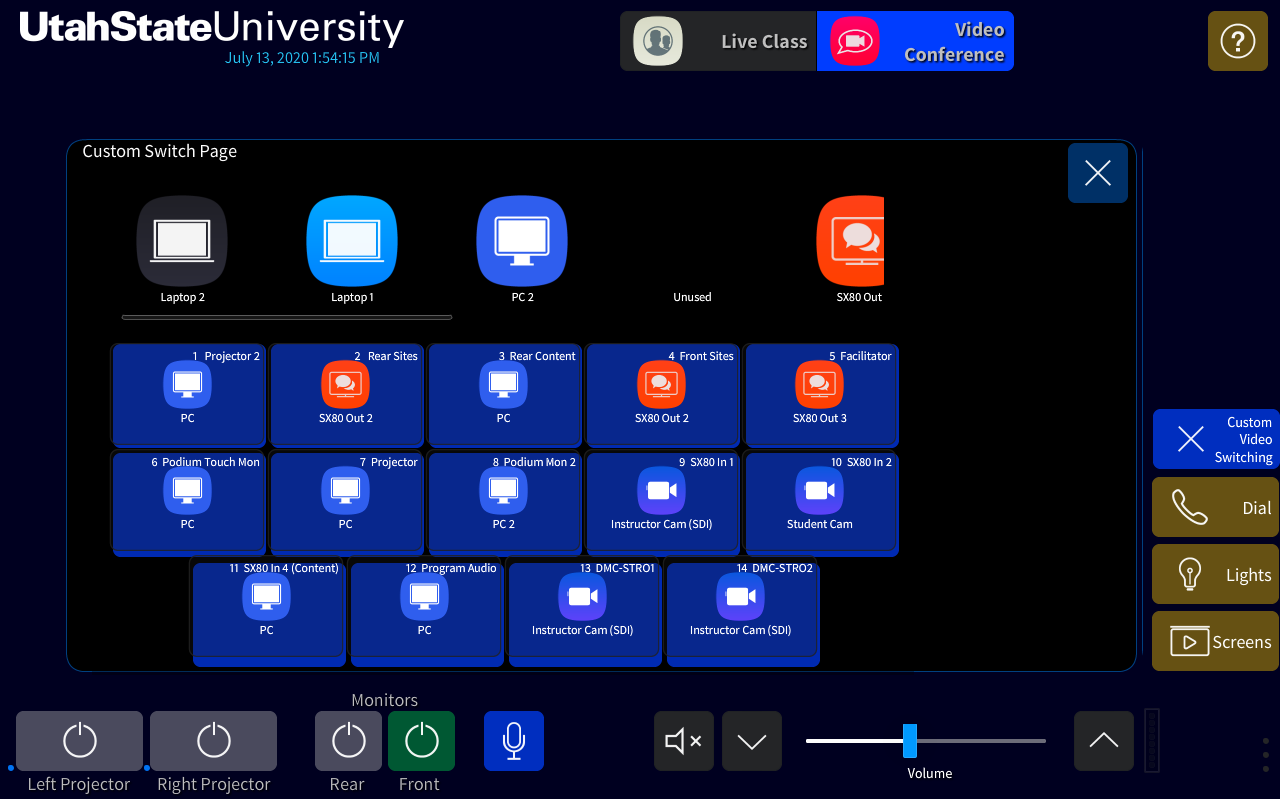
Remember, the Classroom Info page has all of the information on how to set up your room in Huntsman Hall. It should have an image of this page as well with recommended sources in each box. If you follow that picture and copy it, your classroom should be set up correctly.
You may come across a time when you try to open up a tab and it won’t switch screens. This can happen if you have more than one tab open at a time.
If this happens, make sure you close out of all previous tabs before trying to open up another tab. Some tabs take priority over others, so if you seem to not be able to open up a different tab, make sure you have closed out of all of your previously opened tabs first.
The Huntsman Hall Touch Panel system is a very unique system. We hope that you take time to go and practice in your respective room the controls of the Touch Panel. Remember to always use the Classroom Information page for instructions on how to set up your room properly. If you ever have any questions or if there is any more information that needs to be added to this page, please inform the full-time office staff.