Overview
Utah State University has been involved with broadcasting courses across the state for a long time. Over time, equipment is updated and newer and better software is used in newer rooms. However, the university still has some rooms where they use the older versions of room equipment. These systems are very room dependent, so please make sure you feel comfortable with your rooms controls and its own unique system.
Video
Here is a short clip explaining the functionalities of the Old Crestron Touch Panel:
Introduction
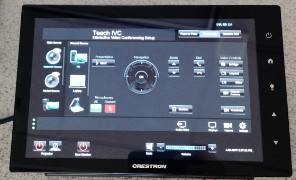
You will find that the black Touch Panel is located on the instructor’s desk. There will not be another Touch Panel at the facilitator’s desk. You will instead use a desktop version of the Touch Panel from your facilitator computer in the back of the room. This is called the xPanel.

When you first enter your classroom and find your Old Crestron Touch Panel, the screen may be black. If this is the case, simply touch the screen to wake it up. Depending on what the Touch Panel was used for previously, the screen could be showing 3 different tabs/screens. One of these screens is labeled Face to Face.
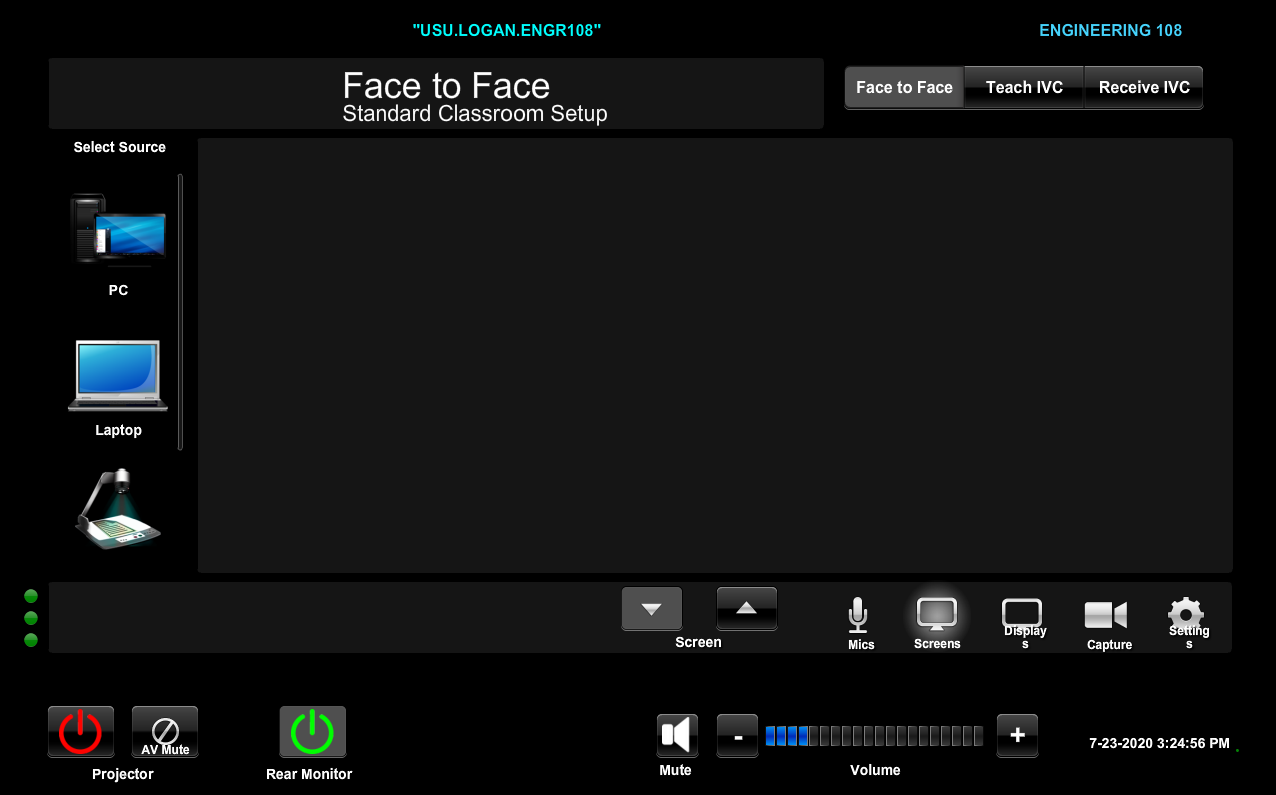
You will notice in the top right-hand corner of the screen are three different options, Face to Face, Teach IVC, and Receive IVC. This screen shows the Face to Face window. As a facilitator, you will be using the other two windows, Teach IVC and Receive IVC, whenever you are using the Old Crestron Touch Panel system.
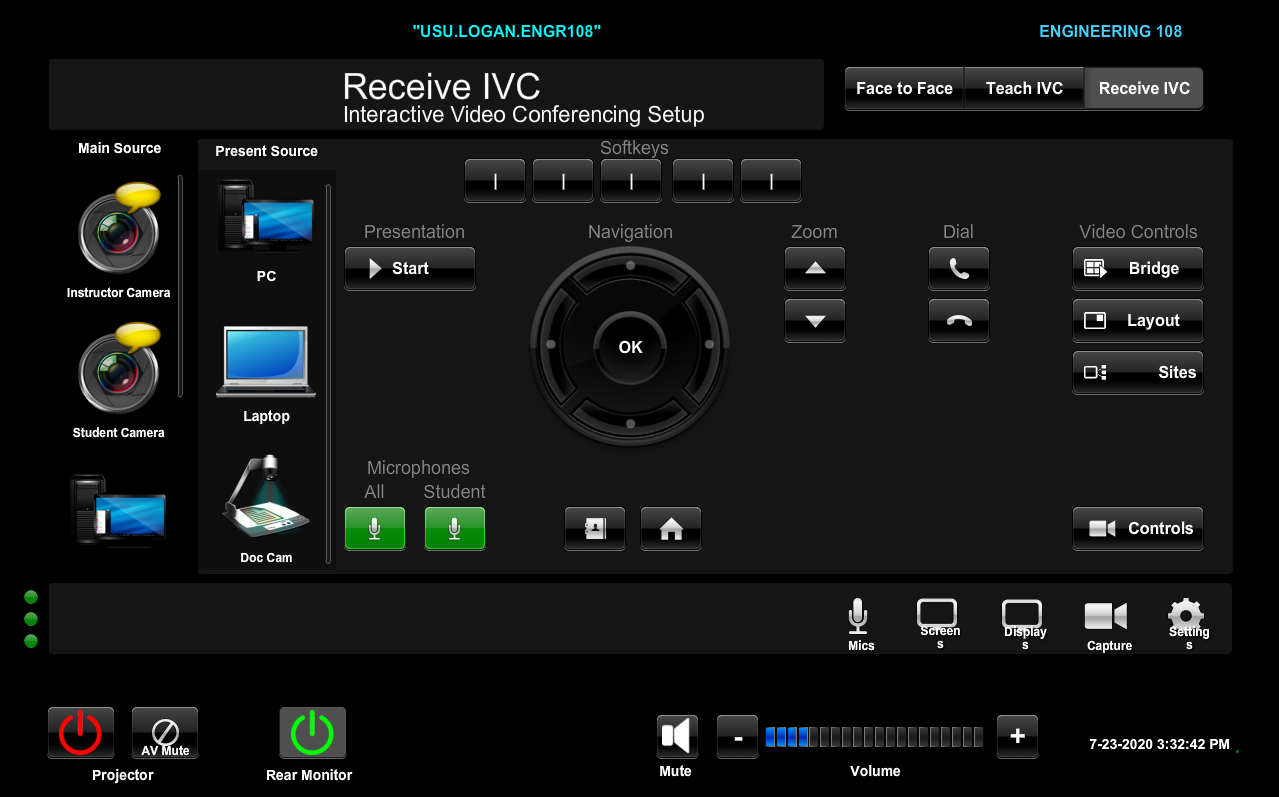
Shown below is the Teach IVC tab window. When facilitating courses, it is important to remember what type of class you are facilitating, Origination or Receive. These tabs have been programmed to better help set up your room if you select the correct tab for the type of class you will be facilitating. If you are facilitating an origination course, you will select the Teach IVC tab. If you are facilitating a receive course, however, you will select the Receive IVC tab.

It is important to know that you can facilitate both receive and origination courses from either of these tabs, but when you select the correct tab, it is much simpler to adjust the room to the correct settings. The Teach IVC and Receive IVC look identical and control similarly, other than how the room settings change slightly.
Basic Controls and Settings
You will see near the bottom of the screen of the Old Crestron Touch Panel buttons and controls very similar to what you would find on an SCCE or Huntsman Hall Touch Panel. You will notice the red and green power buttons. These control the power buttons of the different projectors and tv monitors in your room, red meaning they are turned off while green meaning powered on. You will also notice an AV Mute button next to the Projector button. If the professor you are facilitating for wants to turn off the presentation in the front of the classroom for some reason, you can mute the projector instead of turning it off. By muting the projector, you don’t turn off the projector itself. You merely mute the projector light, preventing it from showing its picture. Clicking the mute button turns this on and clicking unmute turns it back off. Remember, this does not stop sharing your contact with other sites. This only stops showing the picture on the projector in the classroom itself.

In the bottom right hand corner, you will see the volume control. The plus sign turns the volume up and the minus sign turns the volume down. There is also a mute button that will silence the sound in the room. This is not the all mute button. This merely silences the room that you are in.
Above the volume controls, you will find buttons that will help you control aspects of your room. These buttons and controls vary between every room, so make sure you understand your own rooms quirky button layouts.
By clicking the Mics button, a new couple of buttons will appear. This will adjust the volume of the microphone’s room amplification abilities. Some rooms have the capability of using in room speakers to amplify the user’s voice. This controls that amplifications volume as well as turning it on and off with the mute button.

The next button is the Screens button. You will notice that the Mic buttons have disappeared and new buttons labeled Screen will have appeared. This controls the Projector screen in the front of the classroom. Clicking the down arrow lowers the screen, while the up arrow raises it.
Skipping ahead, The Capture and Settings buttons are old windows that we used to use when this system was newer and the rooms were not as advance as they are now. If you click these two buttons, nothing will happen and no new window will appear.

The third button is the Displays button. When you click it, a new window will appear that looks like the picture below. This is where you can find the Custom Video Switch. Here, you can manually choose which display shows which source. You can adjust these setting by clicking on the display you want to change, and then clicking on the source you would like to show. The Source Select list can be scrolled up and down by clicking and dragging in the desired direction. On this screen, there is also the Codec Video layout, which changes the layout of the presentation screen, the On-Screen Display Output, which selects which screen shows the display information, and the selfview toggle button. By correctly selecting either the Teach IVC or Receive IVC tabs, the displays should have their correct sources selected, but this screen is where you can adjust and change those settings. To exit, simply press the “X” in the upper right-hand corner.

Video Controls
On the home screen, you will notice on the right-hand side of the screen a couple of different controls and options.

If you click the Controls button, a new window will appear. In this window, you will find the camera controls. Here, you can switch between the instructor cam and student cam, move the camera left and right, zoom in and out, and change the speed of the camera motion.

These camera controls also have programmable preset locations. By clicking on the 1, 2, or 3 under presets, the camera will automatically adjust itself to go to the predetermined location. To reprogram a preset, move the camera to your desired angle and zoom. Once you have moved the camera, click and hold the preset number you want to assigned it to. After clicking and holding the numbered button for 7-10 seconds, the button should now be programmed to move the camera to that exact location when pressed.
Similar to the display window, you will also find on the camera controls window the Codec Video Layout options, the On-Screen Display Output, and the Selfview toggle button. To leave this window, simply press the “x” in the upper right-hand corner of the window.
Back on the home screen, you will notice on the right-hand side of the screen a button labelled “Sites”. This button makes it so if you are sharing content on the main screen in the room (Usually the large monitor or projector in the front of the room), you will minimize the content and show the distance sites. This is a good feature to use when distance sites are making comments in class and you want to let the students and teacher in your room see who is speaking.
The Bridge Layout cycles through the different site layouts you can have on screen. When you click the button, a very recognizable beeping noise will sound and the layout of the sites will change. Unlike the Touch 10 system, you cannot choose which layout you want initially. To change to the desired layout, you must cycle through all of the options to get to the one you would like to use. Remember to ask your professor which layout they would like to have for their class.
When presenting a present source, it is important to know that you can change the layout of the present source and the main source. You can do this by clicking on the Layout button. When you click the layout button, a set of icons and buttons will appear on the Originating Site Monitor. A picture of this is shown below:
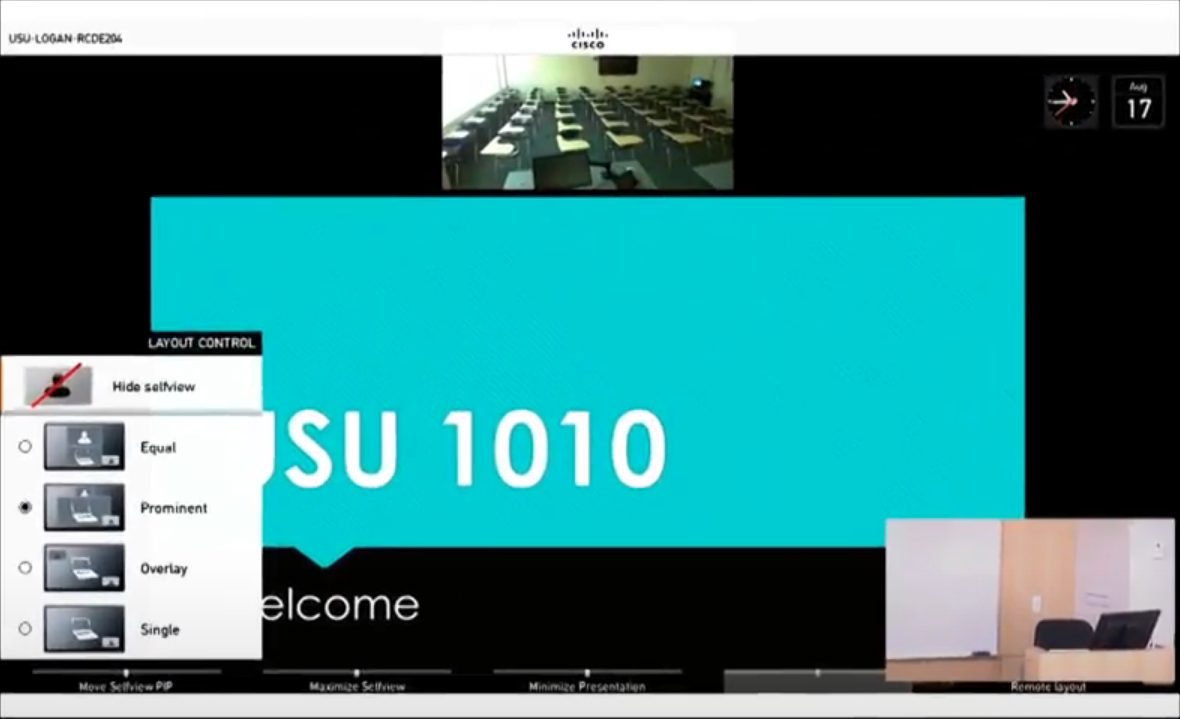
You will notice that there is a side menu with all of the different layout options in the bottom left hand corner as well as different tabs along the bottom of the screen. To utilize these controls, you need to use the remote control set of buttons found on the home screen in the middle of the window that looks like the picture shown below:

You will notice the Soft keys above the navigation circle. To select the different windows and options along the bottom of the screen, click the corresponding Soft key on the touch panel. You will notice in the example below that if you would like to select the Move Selview PIP option, you will need to click the corresponding button on the soft keys as shown.

To navigate the different options in the menu, such as the Layout control menu, simply use the navigation circle to move between options and click OK to select them. Once you have finished adjusting the settings needed, you can minimize these new windows and menus by clicking on the layout button again on the main screen of the Touch Panel.
Once again, if there is any information missing from this page that you feel should be added, please contact the full-time office staff.