Overview
At USU, there are some systems that are still being controlled by a Crestron Touch Panel. One of these systems in a newer and simplified version that mixes old styles of touch panels with newer interfaces. These Crestron Touch Panels can be found specifically in the SCCE building as well as a couple of other rooms around campus.
Introduction
You will find that the white Touch Panel is located on the instructor’s desk. There will not be another Touch Panel at the facilitator’s desk. You will instead use a desktop version of the Touch Panel from your facilitator computer in the back of the room.

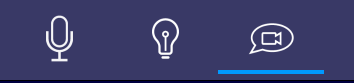
While using the SCCE Touch Panel, you need to remember that we are using the Video Conferencing system. Make sure that you are using the Video Conference settings by making sure that the Video Conference tab is selected. You will find this tab in the upper left-hand corner of the touch panel’s screen and looks like a camcorder within a speech bubble.
The window below will appear after clicking this tab. This is where you will be able to access all of the room’s controls and settings to help facilitate your course. The specific button layout of every room is unique, so please make sure you take time to go and familiarize yourself with your room and understand how it works and its unique quirks.
Main Page
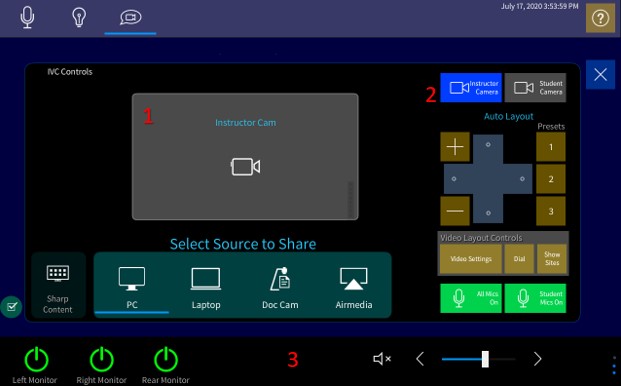
This touch panel system has many similarities to the Huntsman Hall touch panels, but it is different in its own unique way. The main screen is the place where you can:
- Start sharing content/sharing your screen with distant sites
- Control the cameras and microphone mutes
- Power on displays and control the volume settings
Source Sharing
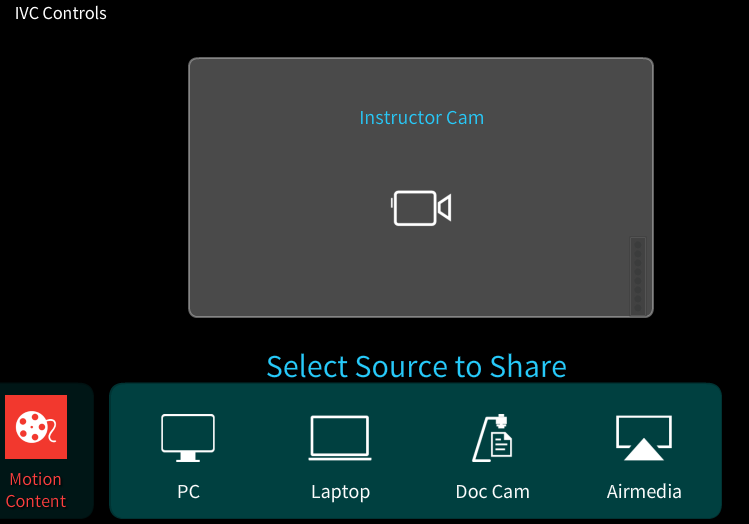
The controls for Sharing Content are found near the middle of the SCCE Touch panel’s screen. If you are currently not sharing anything, your widow will look like this image below:
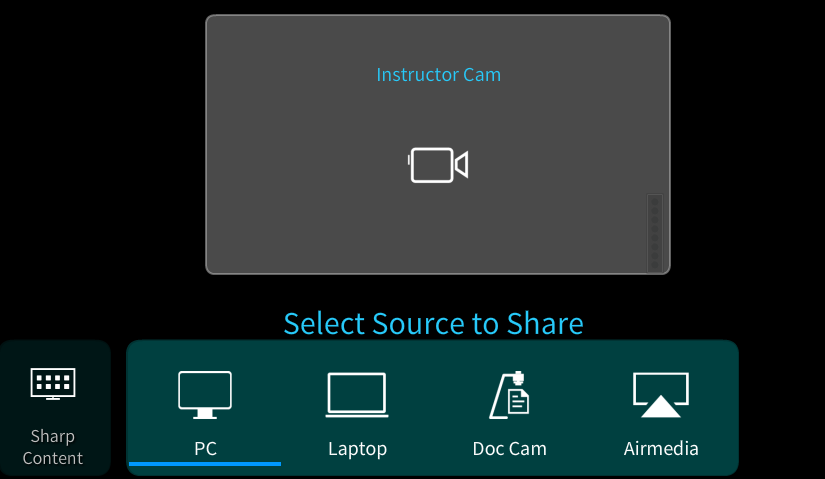
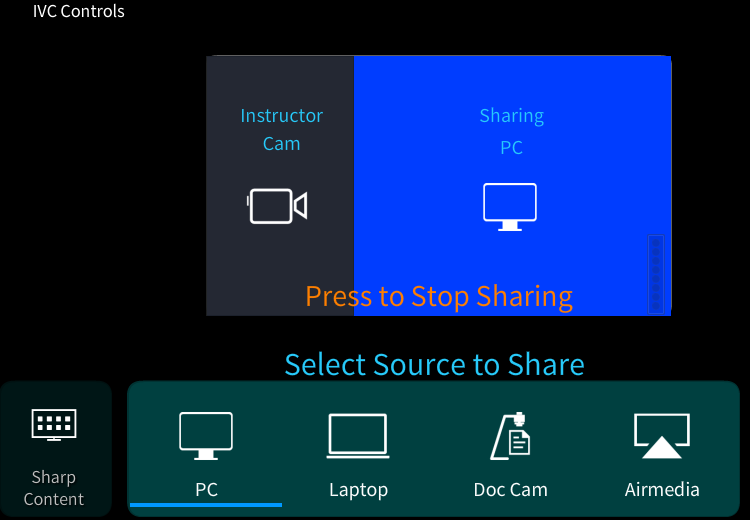
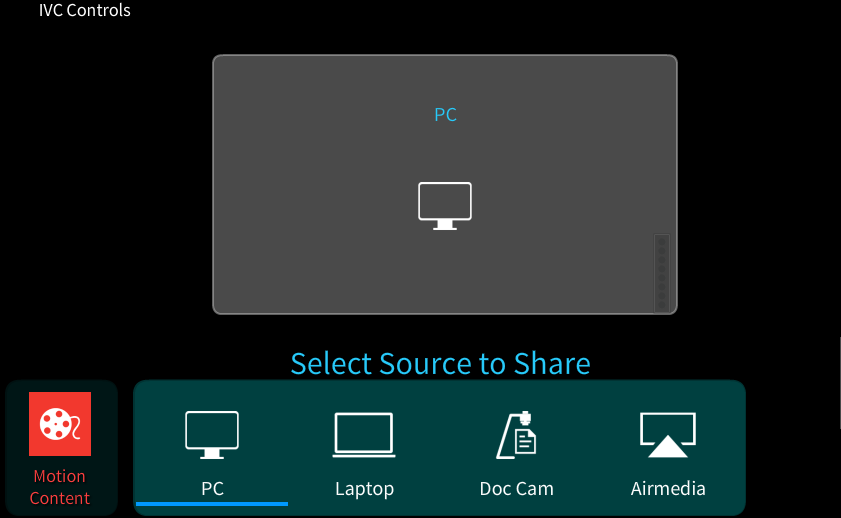
This shows that there is no content, or present source, being shared with the distance sites. This also shows that the instructor camera is being used. Below the gray box, you’ll see 4 present sources you can choose from. To share a screen, simply click on the present source you would like to share and you will begin sharing that source in the call. The gray window will now show the camera you are using along with the source you are presenting. To stop sharing, simply click the orange “Press to Stop Sharing” phrase that is now showing in the window.
There is also the gray box with “sharp content” written in it next to the content options. This shows the quality of content being shown. If you are planning on showing things like PowerPoint presentations, websites, and word documents, keep this box showing “sharp content”. This enhances the quality of still images and makes them crisper and clearer to the distance sites. However, if the class is watching a YouTube video, a movie, or a moving presentation of any kind, you can click on the “normal” button, making it change to a red “motion” button.
This option will allow you to share a single source of content with the other sites. This reduces the amount of content being sent out and produces smoother and clearer video presentations. To use this button, change to the motion option, then share a source. This will change slightly compared to when the box reads “sharp”. This will now only present the content and will no longer show the camera source in the call. Coordinate with your professor to make sure that you use the motion option when they are showing any form of video or motion during their class.
Camera Controls
Next, we are going to discuss camera controls. They are located on the main page of the SCCE Touch panel on the right-hand side of the screen. The camera controls will let you switch between student and instructor cameras, adjust the angle and zoom of each camera, and control the all mute and student mic mute buttons. The All Mics On and Student Mics On buttons work exactly the same as the All Mute button and Student Microphone mute buttons on other Touch Panels. The All Mics button controls all outgoing audio from your classroom, and the Student Mics button controls the outgoing audio from the student microphones around the room.

These camera controls also have programmable preset locations. By clicking on the 1, 2, or 3 under presets, the camera will automatically adjust itself to go to the predetermined location. To reprogram a preset, move the camera to your desired angle and zoom. Once you have moved the camera, click and hold the preset number you want to assigned it to. After clicking and holding the numbered button for 7-10 seconds, the button should now be programmed to move the camera to that exact location when pressed. You will also notice a few buttons in the Video Layout Controls section, but these will be discussed in the next section under “Different Controls”.
Display and Volume Controls (Room Controls)
In the bottom left hand corner, you will see a bunch of either green or gray power buttons. These buttons are the power buttons that turn the projectors and monitors on in the classroom. Labelled as such, if you click a gray button, it will turn green and turn the respective device on. If you click a green button, it will turn gray and turn the specified device off.

In the bottom right hand corner, you will see the volume control. The right arrow turns the volume up and the left arrow turns the volume down. There is also a mute button that will silence the sound in the room. This is not the all mute button. This merely silences the incoming audio to the room that you are in.
Different Controls
You will find the Video Layout Controls located in the Camera Controls area. Under the Video Layout Controls, there are 3 different buttons. You will almost never use the Show Sites button, but it will allow you to remove the presentation and show the sites in a large view on the projector or tv in the front of the room. The Dial Button is used to manually dial out numbers and addresses to the room, and you will only use this if someone from the office ask you to do so. As a facilitator, you will mainly be using the Video Settings button. When you click on the Video settings button, a new window will appear which will look like this:
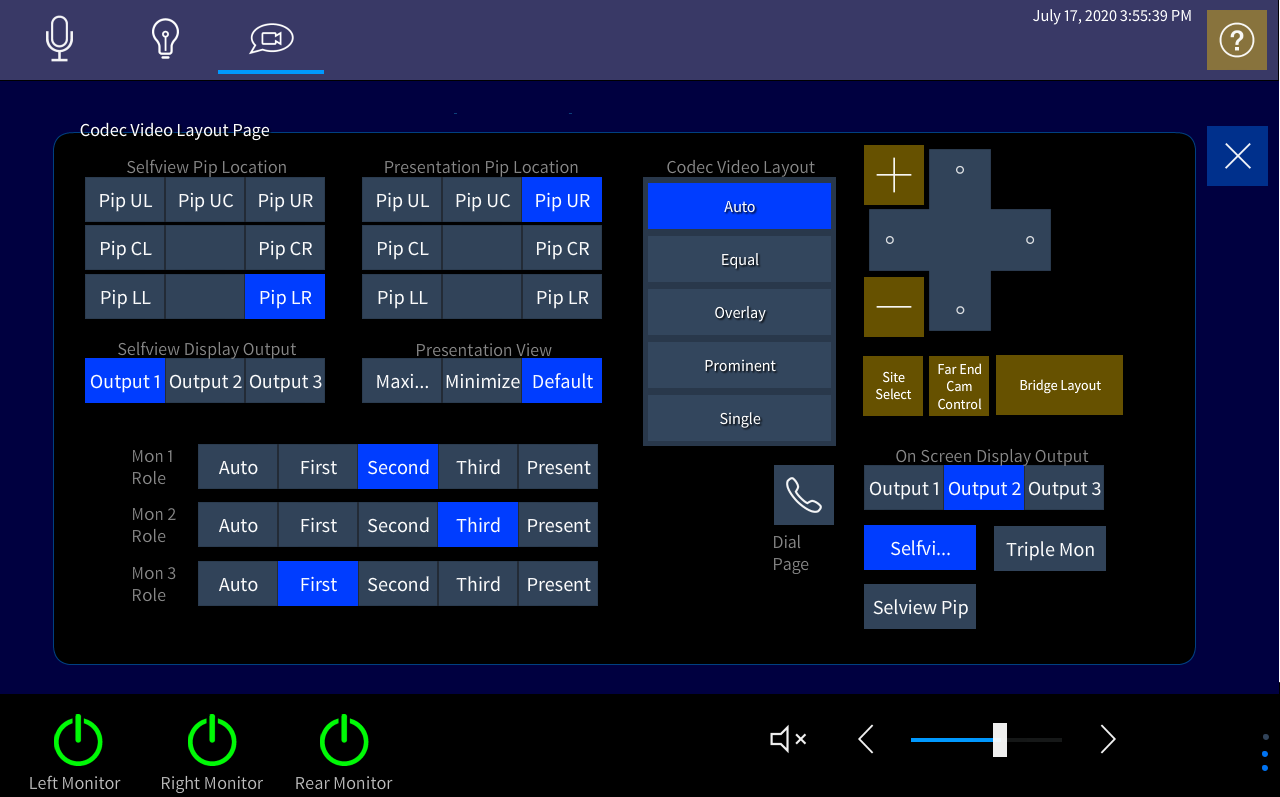
You will notice things like the Codec Video Layout, the Monitor Roles, the Selfview Pip location, and more on this page. As you read the information on the Classroom Info Page for your specific room, you will find a picture of the Touch Panel with the correct settings that will help set up your room. By matching that picture in the Classroom Info Page, you will have everything ready for your class.
You will also notice that the camera controls are also on this page, but there are a couple of new buttons and settings that you can adjust, shown below:
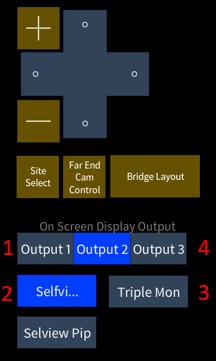
- The On-Screen Display Output. You will have control over where you have the on-screen display, which shows the number of participants and other in call information. You can select which output (or screen) this information will show on.
- The Selfview Button. This toggles the visibility of your selfview on screen.
- The Single/Triple Monitor Button. You will be able to decide if you want all of your sources to be split between three monitors (triple monitor mode) or to be combined into a single monitor view (single monitor mode).
- The Bridge Layout Button. You will be able to cycle through the different site layouts you can have on screen. When you click the button, a very recognizable beeping noise will sound and the layout of the sites will change. Unlike the Touch 10 system, you cannot choose which layout you want initially. To change to the desired layout, you must cycle through all of the options to get to the one you would like to use. Remember to ask your professor which layout they would like to have for their class.
The other buttons, such as Site Select and Far End Cam Control, have since been outdated, meaning as of this moment, they currently do nothing.
That is all that you will find in the Video Conferencing tab. There is a tab that is specifically programmed for lights. If you click on the Lights tab in the upper left-hand corner of the Touch Panel, a new screen will appear, shown below:
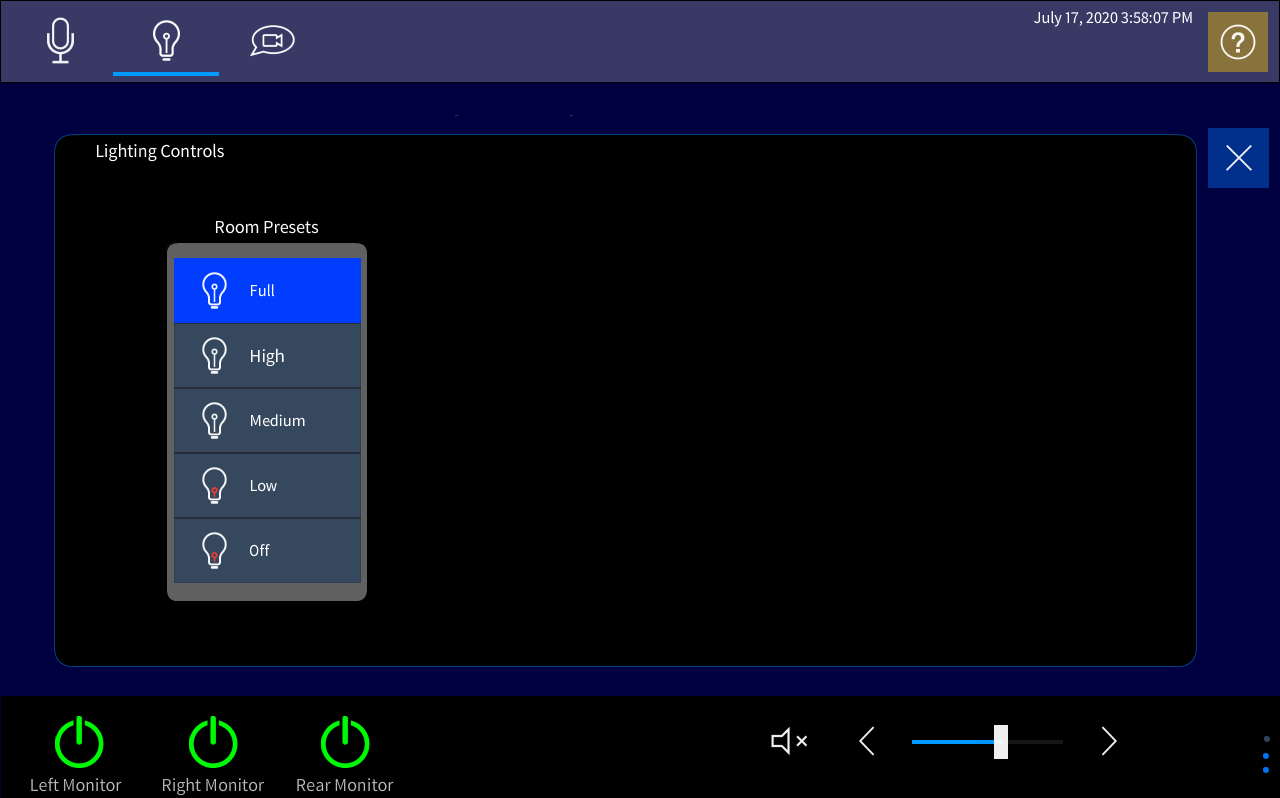
This new window replaces the main screen options with new options about lights. This room features 5 preprogrammed options for your room’s lighting. You can test each of these programmed options by clicking on the different available options listed, like Full and Low. To exit, simply press the blue “X” that is the right-hand side of the screen.
This room is very particular about it being in the Video Conferencing controls tab. If you leave the tab, you will more than likely lose your settings that you have just set up. Make sure that you have the room ready to go and stay on the Video Conferencing controls tab for the duration of the class you are facilitating. These settings and controls are bound to change over time.
If there is information missing or if information needs to be added to this page, please inform the full-time office staff.