Kaltura Classroom is a recording software installed on all of the instructor computers on campus. If Zoom is involved in a class, recordings should be done through Zoom instead of over Kaltura, as the two programs do not always run well together.
Getting Started
1. Launch Kaltura Classroom by logging into the classroom computer and clicking on the Kaltura Classroom icon on the desktop. 
2. When you click on the Kaltura Classroom icon, a new recording window will appear. This is the main interface for Kaltura Classroom.The window contains the control sidebar, the recording panel with the "start recording" button, the primary video panel, the secondary video panel, and the audio settings. The primary video panel usually displays the camera facing the presenter while the secondary video panel displays the content (usually the instructor computer).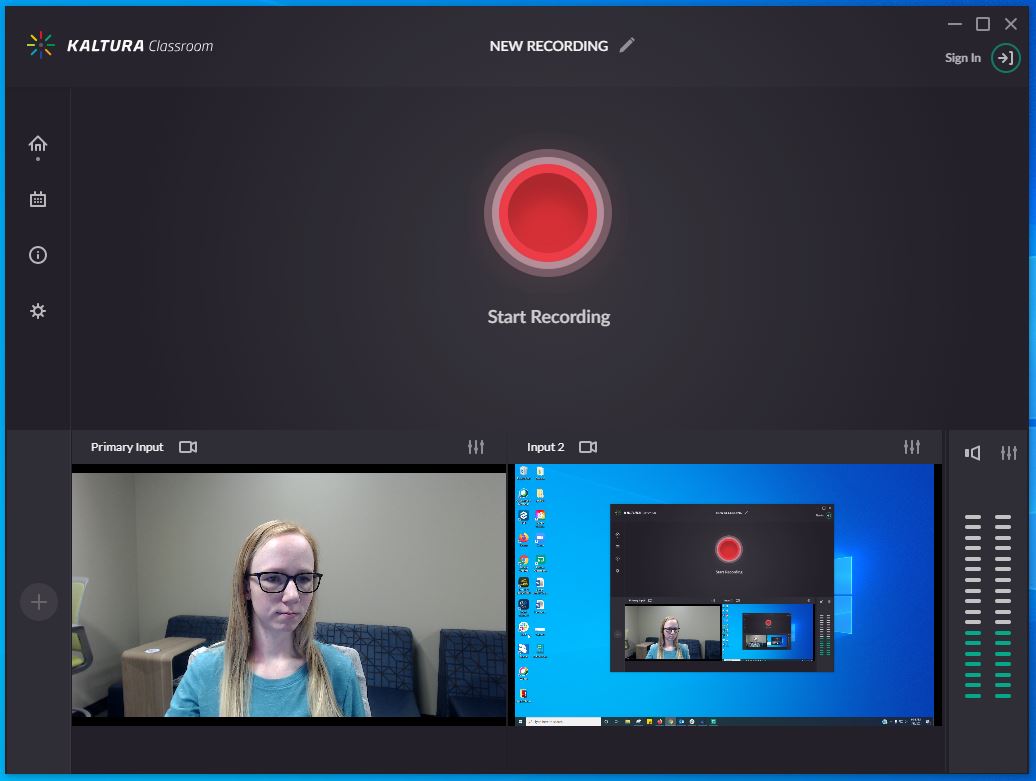
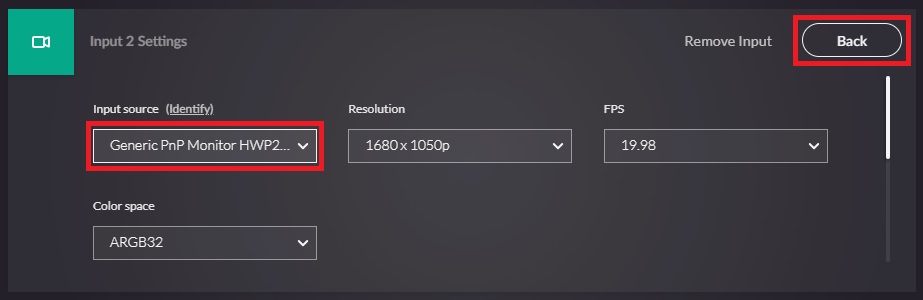
3. Make sure the primary and secondary video panels are displaying the correct content. If they are not, select the slider icon in the top right of the panel. Select the "Input Source" to access the drop-down menu with all of the source options. Once the correct source is selected, choose the "back" button in the top right of the entire Kaltura window to return to the recording homepage.

4. Make sure the correct mic source is selected as well. To the right of the video panels are the audio settings. If the blue/green bars are moving up and down, audio is being received. Change the mic source the same way you change the video panel sources, by selecting the sliders in the top right.
Note: Once recording starts, you can’t change audio or video sources. To switch devices, stop the recording and start a new one.
Start/Manage a Recording
1. When you are ready to start the recording, select the red "Start Recording" button in the middle of the page.
2. Sign in when prompted to enter an A number and password, then the recording will load for several seconds before the recording begins.
3. Once recording, you can pause at any point with the pause button in the middle of the recording circle. When ready to finish the recording, press the square stop button to the left. To the right is an x, which will delete the recording.
4. Once the recording has stopped, a "Recording Complete" page will appear. Enter a different title if preferred and then click "Save" in the top right.
Publish a Recording in Canvas
Enable Media Gallery
Media Gallery needs to be enabled in the user's course for them to publish a Kaltura video. Add that by following these steps:
1. Open the course and select "Settings" at the bottom of the left hand navigation.
2. Open the "Navigation" tab at the top. ![]()
3. Scroll through the page and find "Media Gallery." Select the three dots to the right of it and click "Enable." 
4. Scroll all the way to the bottom of the page and click "Save." Media Gallery should now appear along the left hand navigation.
Publish a Video
Users can find their Kaltura videos in Canvas. Make sure Media Gallery is activated in the user's account before trying to publish a video.
1. Sign into Canvas and select the profile picture in the top left along the menu. When a sub-menu appears, select "My Media."
2. Select the video(s) that should be published and then click on Actions --> Publish in the top left.
3. A new page will show up asking about "Publishing Status." Select "Publish." 
4. A list of courses will appear. Check the box next to the correct class and click "Save."
The instructor and students can access the videos by opening Media Gallery in the course.
Troubleshooting
If the video panels are only displaying black or grey screens, try changing the input source (accessed by the sliding panels in the top right corner of each). If that doesn't work, completely restart the application. Find the Kaltura icon in the bottom right of the computer task bar. Right click and select "quit." 