Helpful Room Hints
Zoom only Classroom
This Classroom is a newly designed room that only has Zoom capabilities available (No IVC). It features a really unique design with the Joystick Module and uses the newly installed Crowd Mics system.
Second Monitor at the Instructor's Desk
There is now a second monitor located on the instructor's desk in this room. This monitor is specifically used as an extended display for the instructor computer.
What this means is that instructors teaching from the room can now have zoom participants showing on this second monitor while having content showing on the Surface Studio and Projector (they are duplicated displays). If you are facilitating a Web Broadcast or Hybrid course in this room, please familiarize yourself with Using Dual Monitors in Zoom so you can help professors and instructors use this new monitor to the fullest extent!

Cameras
The cameras in this room can be controlled by either using the Touch Panel or the Joystick Module at the facilitator desk.
Crowd Mics
This classroom features Crowd Mics, which is a new way for students to use their cell phones as student microphones during zoom calls. You will find iPad on the instructor's desk and you will find the QR Codes tapped near the doors of the classroom.
Facilitator Monitor
The Facilitator monitor is a bit different in this classroom than in other IVC classrooms. The monitor is split up into different sections that will show you a lot of information.

You will notice that there is a preview portion and a zoom portion. The zoom portion of the monitor will show you what is currently being shared in zoom (See Joystick module bullet point #2). You also have a preview portion that allows you to see what the other camera is showing and will let you see where you are moving the camera, even though it may not be showing in Zoom. You also have a couple of smaller screen that will show you what is being shown on the PC, a Laptop connection, and two other views of the instructor and student cameras.
Joystick Module
This room has a very unique and fun to use controller for the cameras. It features a movable joystick and several buttons that can adjust and control the cameras in the room. The system may fall asleep, if it does, the buttons will appear to be unlit and there will be a message saying "I'm sleepy". Simply click a button on the joystick and it will wake up.
The controls of the Joystick Module are pretty simple. You have a joystick that controls the movement of the cameras as well as the zoom. The module has 6 buttons that will all be different colors. From left to right (See picture below), you have the 2 buttons to choose what camera to move, 2 buttons to choose which camera to present/show, a button to choose what shows on the projector in the room, and a final button that allows you to use camera presets and change menu setting (such as Exposure, White balance, and Hue).
Joystick Asleep
Camera Buttons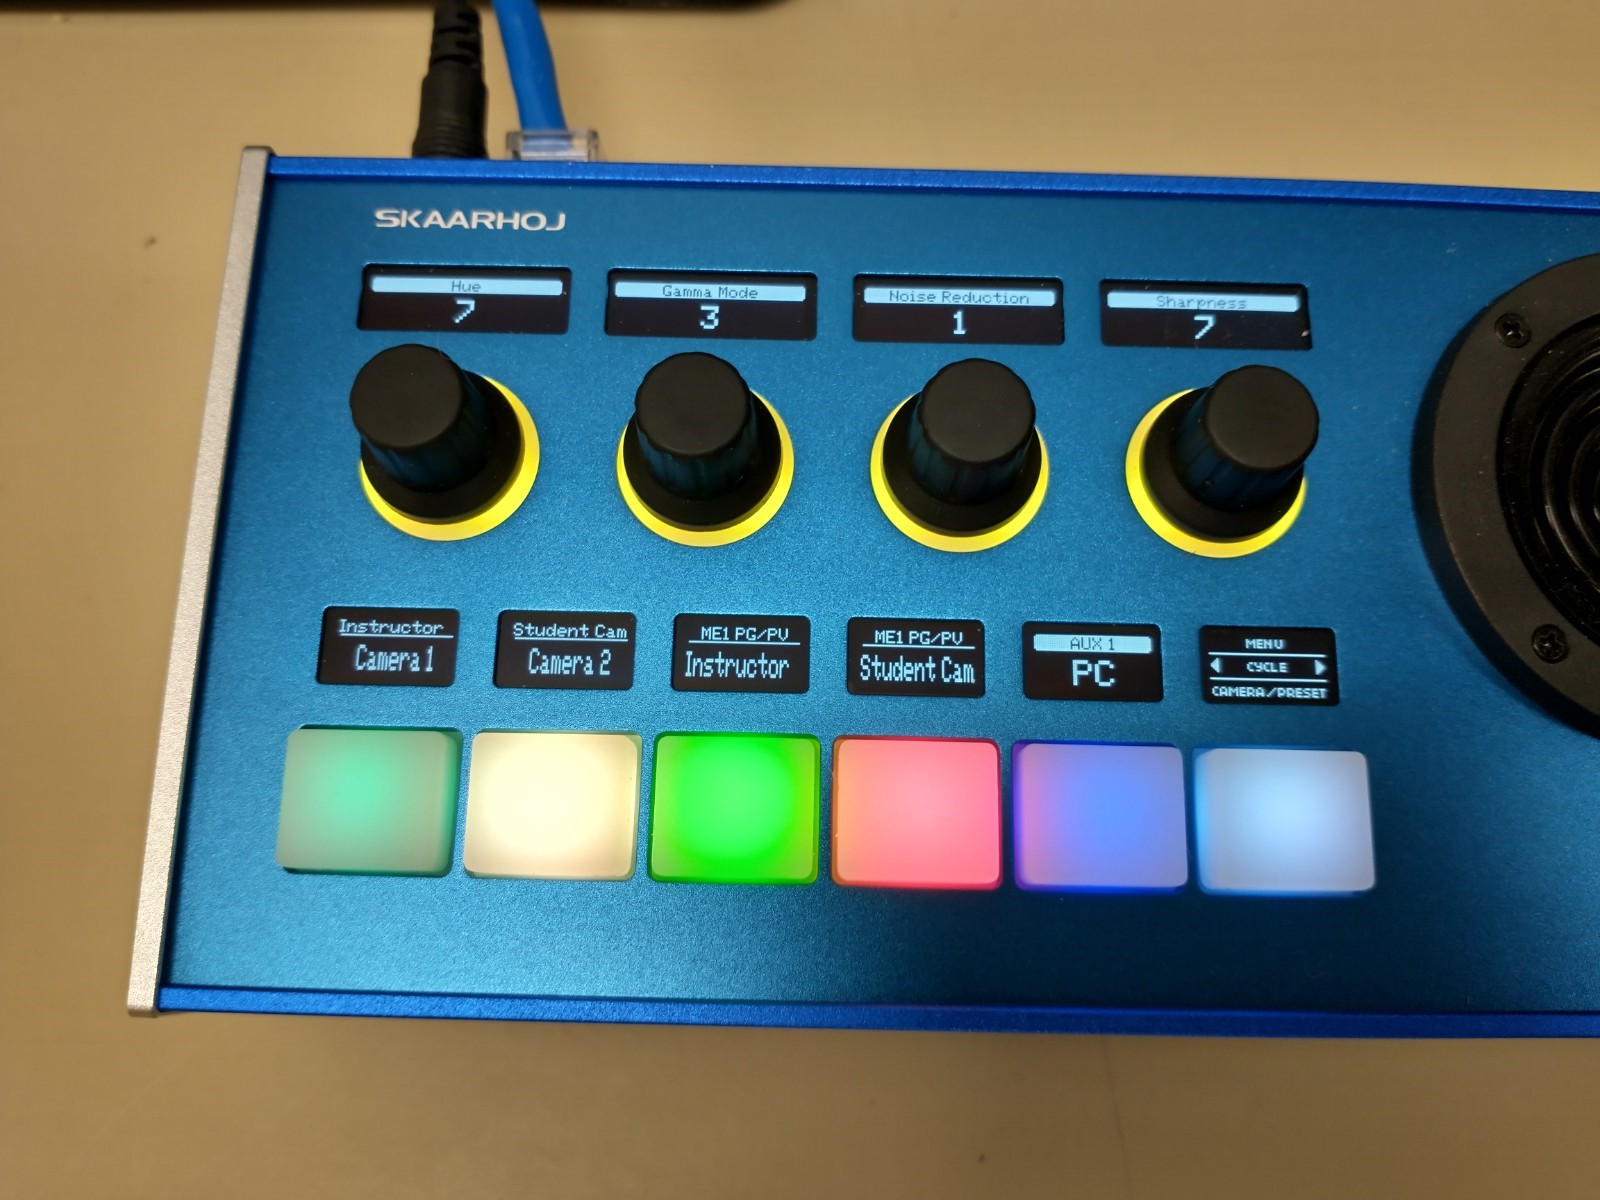
Camera Presets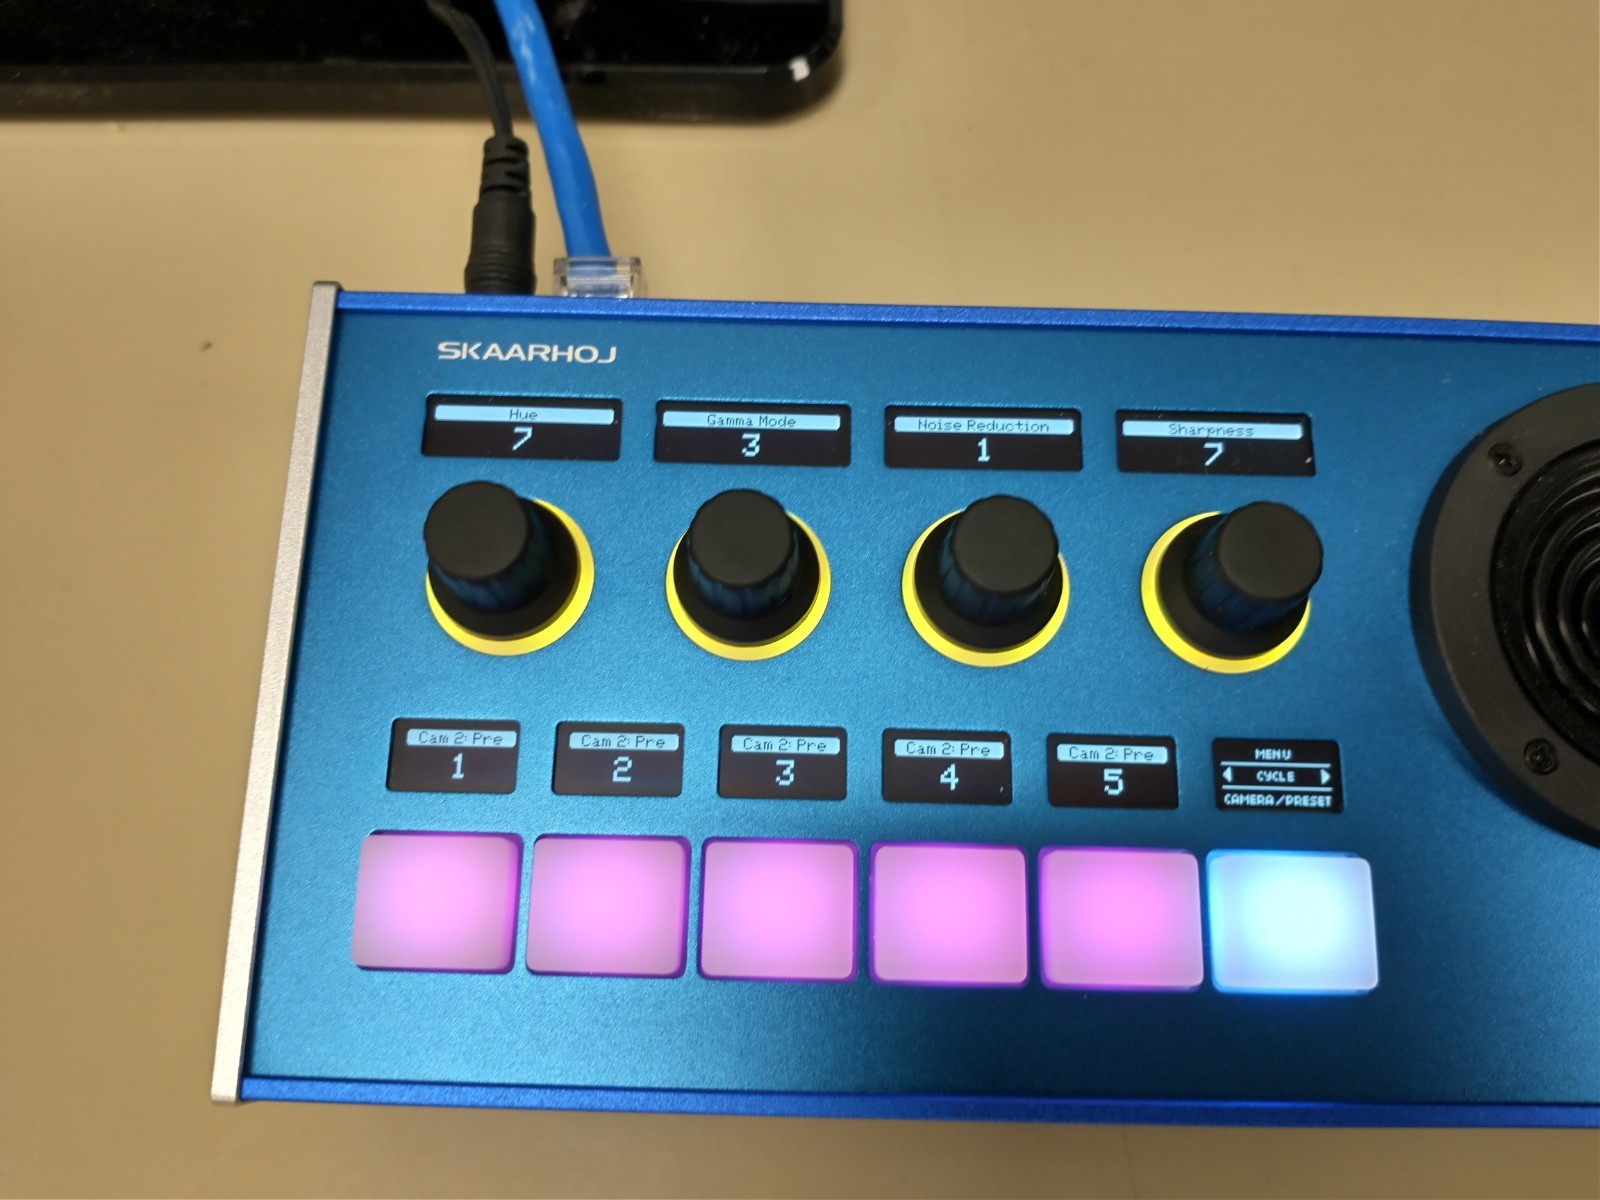
- The first set of 2 buttons allow you to choose which camera you want to control with the joystick. Labelled Camera 1 and Camera 2, which ever camera is selected, their respective button will shine brighter. In the picture below, it shows that Camera 2, or the Student Cam, is currently selected and will move if you adjust the joystick. You can even control the camera when the camera is not being shared in a Zoom call, so you can adjust the camera before switching feeds.
- The second set of 2 buttons allow you to choose which camera you will share and have selected in Zoom. You will see that buttons will be either red or green, depending on which camera is selected. Which ever camera's respective button is red (in the picture below, the Student Cam is selected), That is the camera that Zoom is currently showing in the call (See the Facilitator Monitor section).
- The 5th button, which is a dark blue/purple color, lets you choose what you show on the projector. This is easier to understand and control from the Touch Panel located in the room, but you can also adjust the "share" option on the Joystick Module. You can change this setting by pressing on the left or right side of the button to cycle through the options.
- The 6th button, which is a lighter blue color, gives you the options of using Camera Presets as well as changing menu settings. To switch to the Camera Presets, press on the bottom of the 6th button. The 6 buttons will then change color and you will see the Camera Preset options appear. You can then select which preset you want to use, then you can simply press the 6th button again, but this time in the center of the button, to return to the main button layout. You also have the option of changing menu settings by clicking on the top of the 6th button, which will cycle through the different menu options and settings. You will not need to adjust these settings unless they do not match what is shown below in the Correct Menu Settings section.
Correct Menu Settings
Use these photos as a reference to make sure that the Menu Settings are correct:
Camera Presets
Camera Speed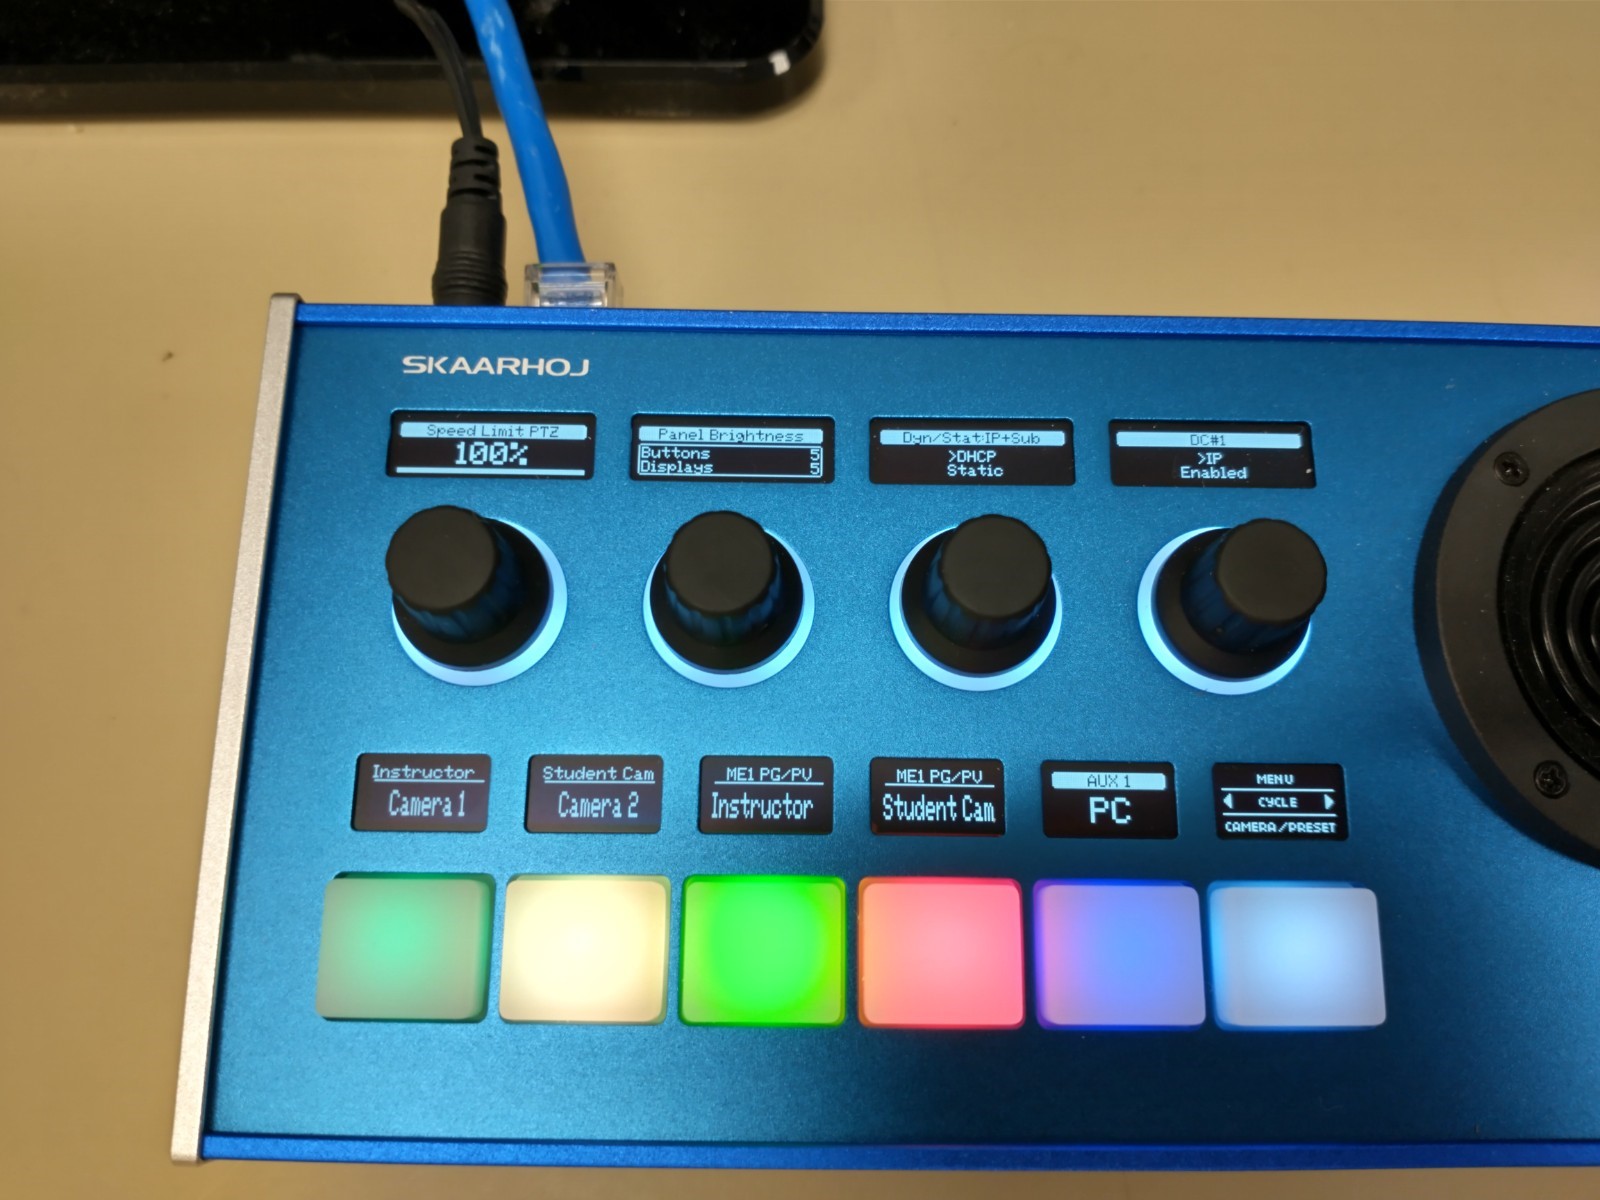
Exposure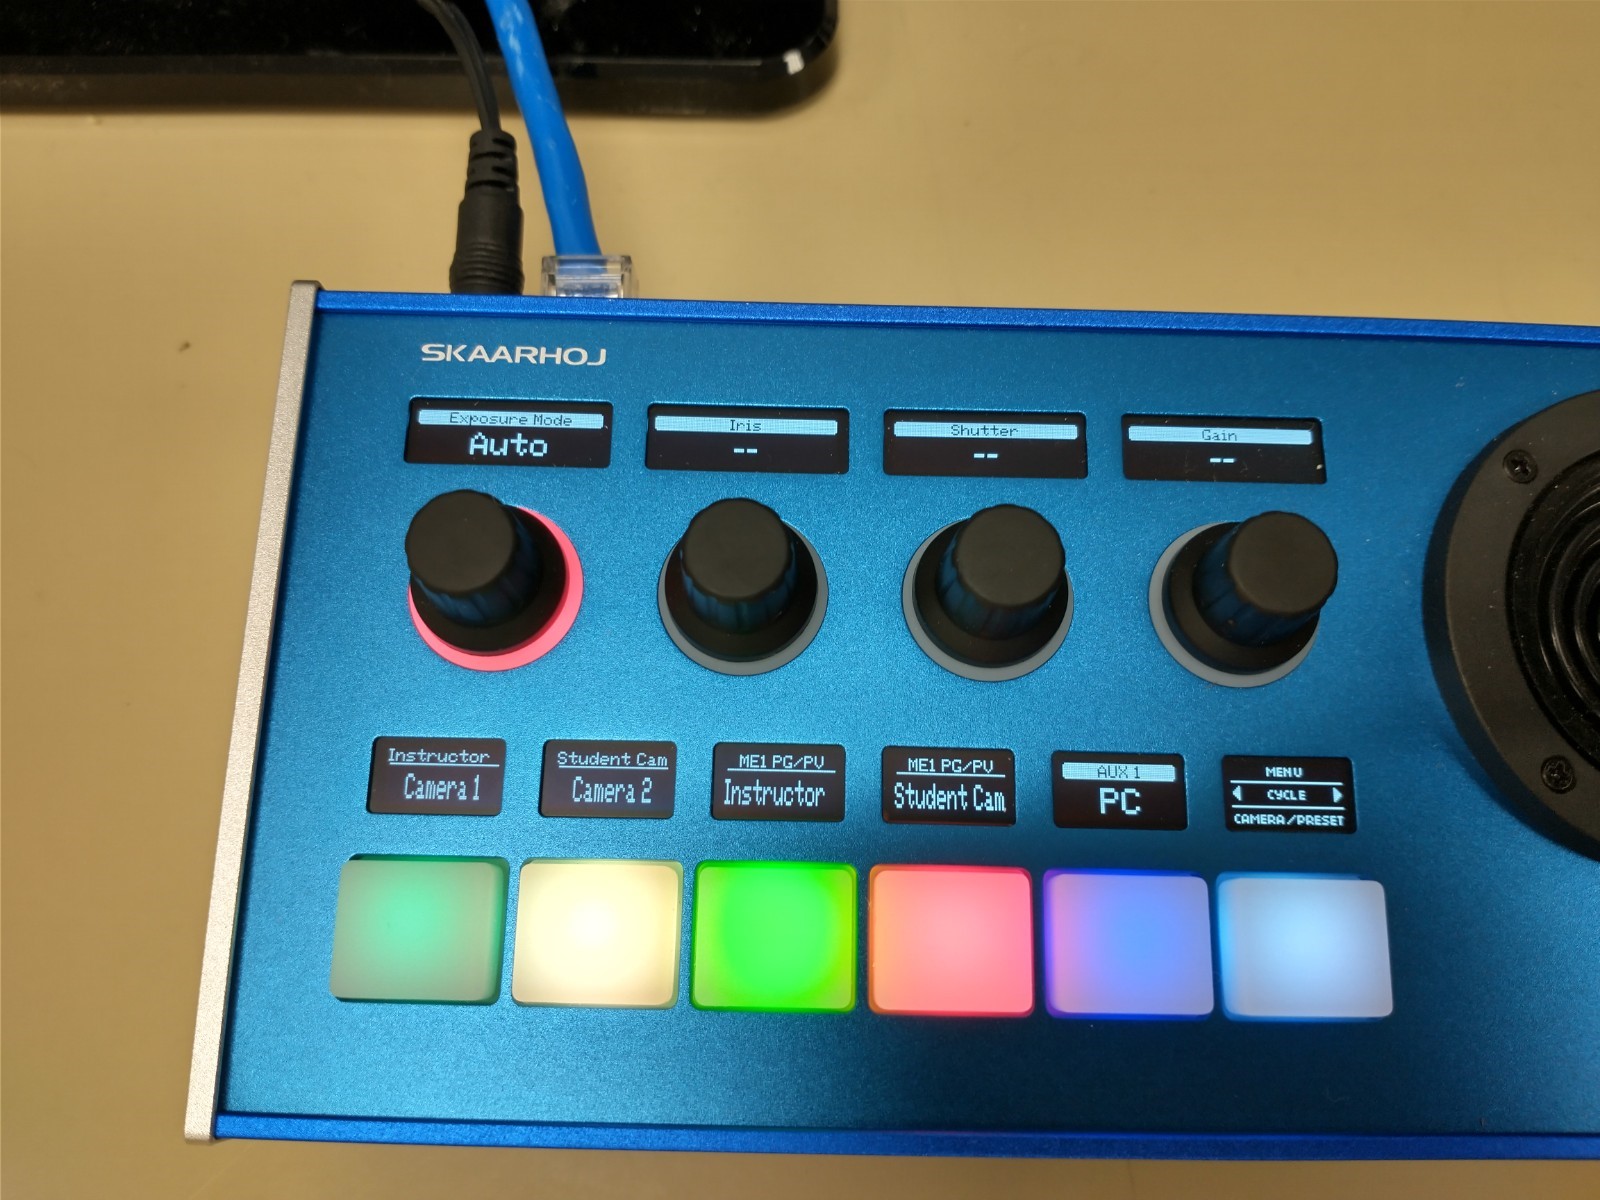
Focus
Hue
Joystick Asleep
Known Issues
You will also want to make sure that the video is set to use the capture card (AV.IO) when using Zoom in this room.
Additional Information
Student View:
Instructor View:
Location:
On This Page
Quick Facts
| Room Type: | Classroom |
| Codec: | N/A |
| Student Mic: | Crowd Mics |
| Facilitator Ctrl: | F2F Touch Panel Joystick |
| Doc Cam: | Tabletop |